Brewing coffee is already a science. When using an espresso machine, it feels like you need a chemistry degree to make a decent latte.
Not to worry. Using a home espresso machine can be a simple, easy process once you understand the basic espresso-brewing process. It’s important you measure your inputs and prepare the portafilter properly.
I’ll explain each step in more detail, and provide tips for getting the best espresso. We have dozens of follow-up articles on espresso at Craft Coffee Spot.
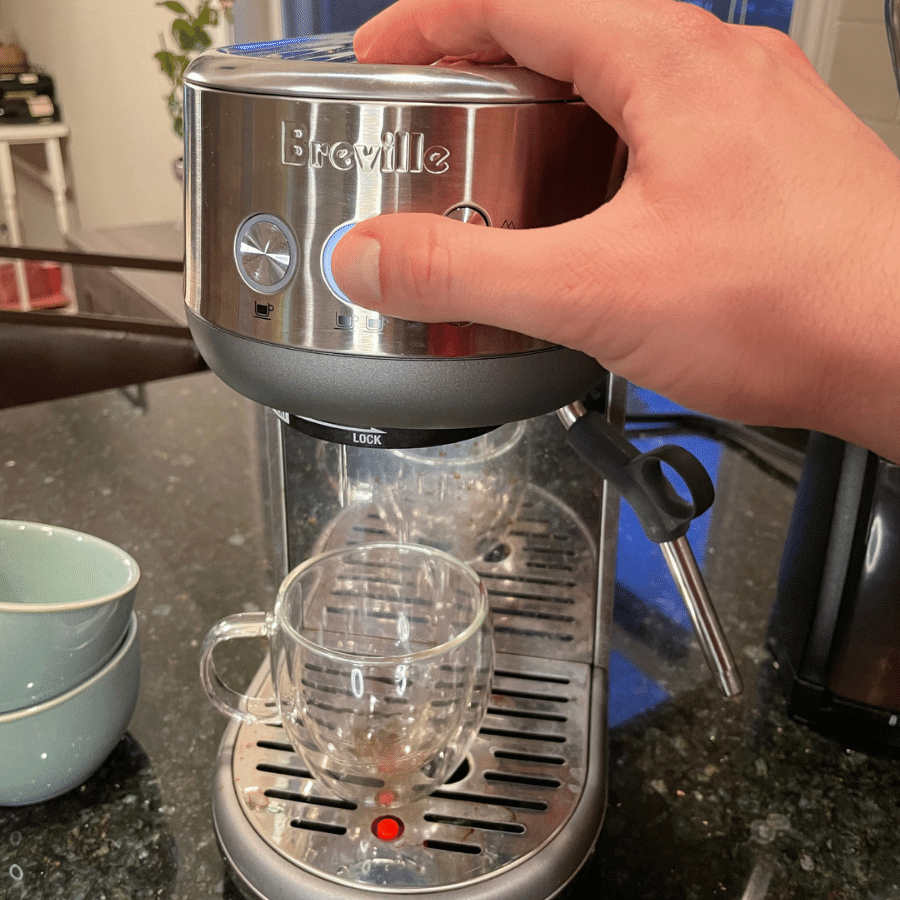
1. Prep the Machine
Just because the espresso machine is plugged in and turned on doesn’t mean it’s ready to start pulling shots. You want to make sure all parts are in working order and ready for brewing.
First, wait for the heating system to get up to brewing temperature. This can take some time, from 3 seconds for a ThermoJet to 20 minutes for a large boiler.
Once you’ve reached brewing temp, make sure the brew head is preheated and clear of debris or espresso grounds. The best way to do this is to pull a blank shot.
After this, quickly inspect your other brewing equipment to make sure it’s clean and in brewing shape. Then, you’re ready to get started.
2. Measure and Grind the Beans
Pulling an espresso shot is a lot like cooking a meal. You need to follow a recipe. The first ingredient in an espresso recipe is the amount of coffee you use. This is called your dose, and it’s important to measure it precisely using a coffee scale.
Espresso reacts to the slightest change in each variable of brewing. So, even a half-gram of difference in your dose can have an effect on your espresso. Think of the dose as follows:
- single-basket: 7-10g
- double-basket: 16-20g
You can (and will) make adjustments later, so don’t be afraid to pick an arbitrary dose in this range to get started.
How much espresso you brew should be a ratio of the dose. Start with a 1:2 coffee-to-espreso brewing ratio. Your espresso should weigh twice as much as your dry dose.
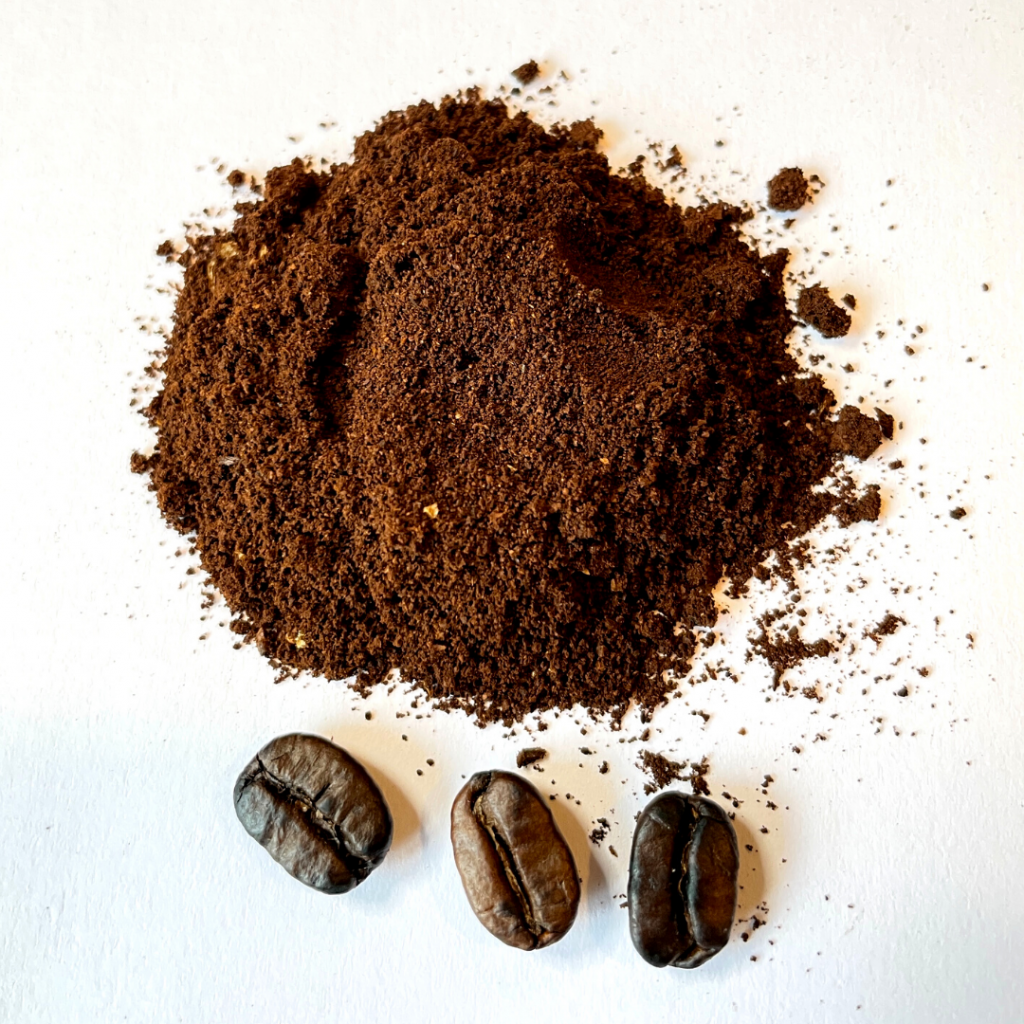
Now you need to prepare coffee for brewing espresso. This all starts with quality, fresh coffee beans. The compounds in coffee that create its rich flavors break down over time, so you want to use coffee that’s been roasted recently. Try not to use coffee that’s more than three or four weeks old.
However, you don’t want that’s too fresh, since CO2 gets trapped in coffee beans when roasting, which can negatively impact your coffee’s flavor. You want your coffee to “rest” for a few days before brewing, which is 1-2 weeks from roasting for espresso.
Once you have your chosen beans, you need to grind them. For espresso, coffee needs to be ground very fine. To get the right grind size, try to get coffee grounds that look like fine sand. They should be almost powdery or fluffy.
A good espresso grinder is essential for getting the right grind size, so be sure to invest in a standalone grinder or a machine with a built-in grinder!
3. Load the Portafilter (Important Step!)
Once you have your ground coffee, it’s time to load it into the portafilter. Carefully transfer your ground coffee into the portafilter from a dosing cup or grind directly into the portafilter. Avoid spilling coffee since that will affect your dose.
Evenly distribute all the grounds around the portafilter. You can use your finger or tap the sides to do this.
Next, you want to get rid of any clumped grounds. These clumps block water and cause uneven extraction. The best way to break clumps is with a WDT tool.
Gently rake the bottom of the portafilter in a circular motion using WDT. This breaks apart coffee grounds that have gotten stuck together via static electricity and helps further create an even distribution of grounds.
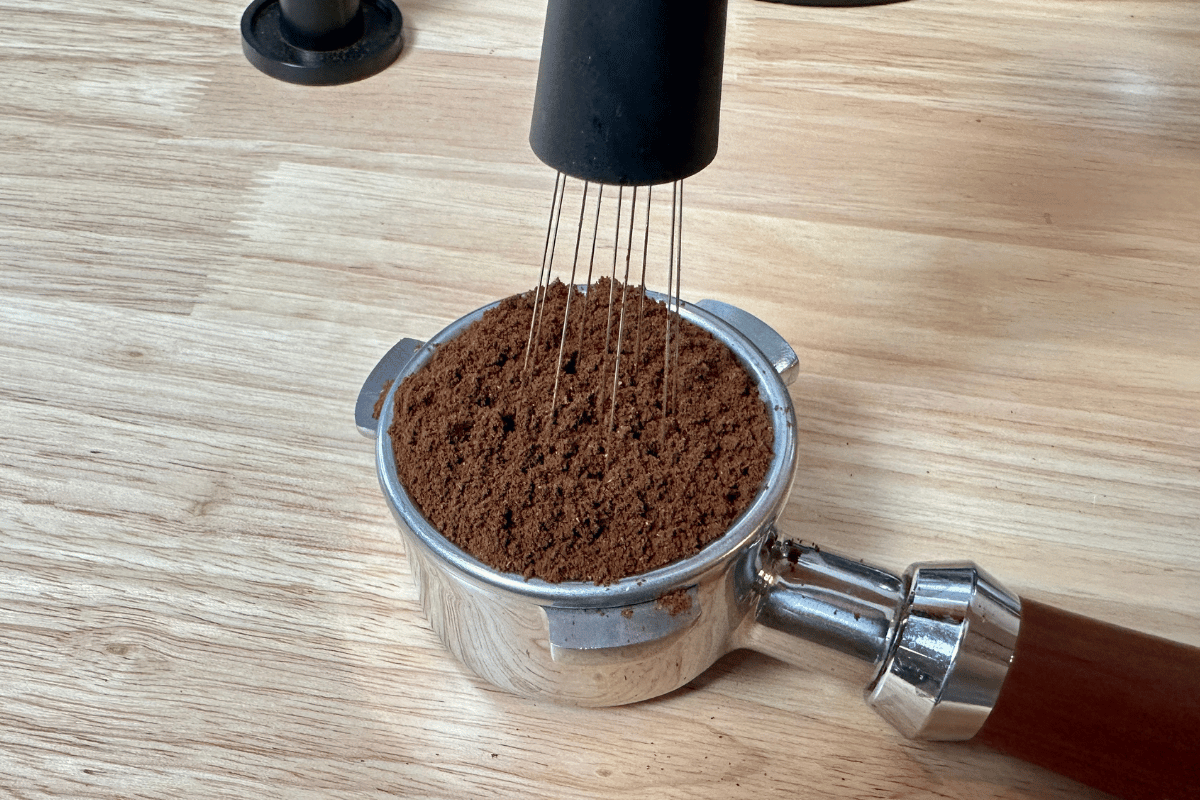
What’s the point of working the coffee bed like this? It ensures even extraction once you begin brewing and prevents channeling. The water in an espresso machine is under pressure, and it’s going to look for the path of least resistance to try and break through your coffee bed.
If there is no path of least resistance because all the coffee is spread evenly, water will flow evenly across the whole bed of grounds. This is what creates a balanced, flavorful, clean-tasting espresso.
Uneven distribution allows water to move through channels in the coffee bed, creating uneven extraction. Essentially, some coffee grounds are “brewed” more than others. This creates unbalanced, muddy shots.
Once your bed is distributed, it’s time to tamp. “Evenness” is the name of the game with tamping. Gently place your tamper in the portafilter on top of the coffee grounds. Grasp the tamp like a doorknob, with your thumb on one side and your index finger wrapping around the other.
Align your forearm so that your elbow is in line with your wrist directly above the tamp. Move your whole arm downward until the grounds are tightly packed together.
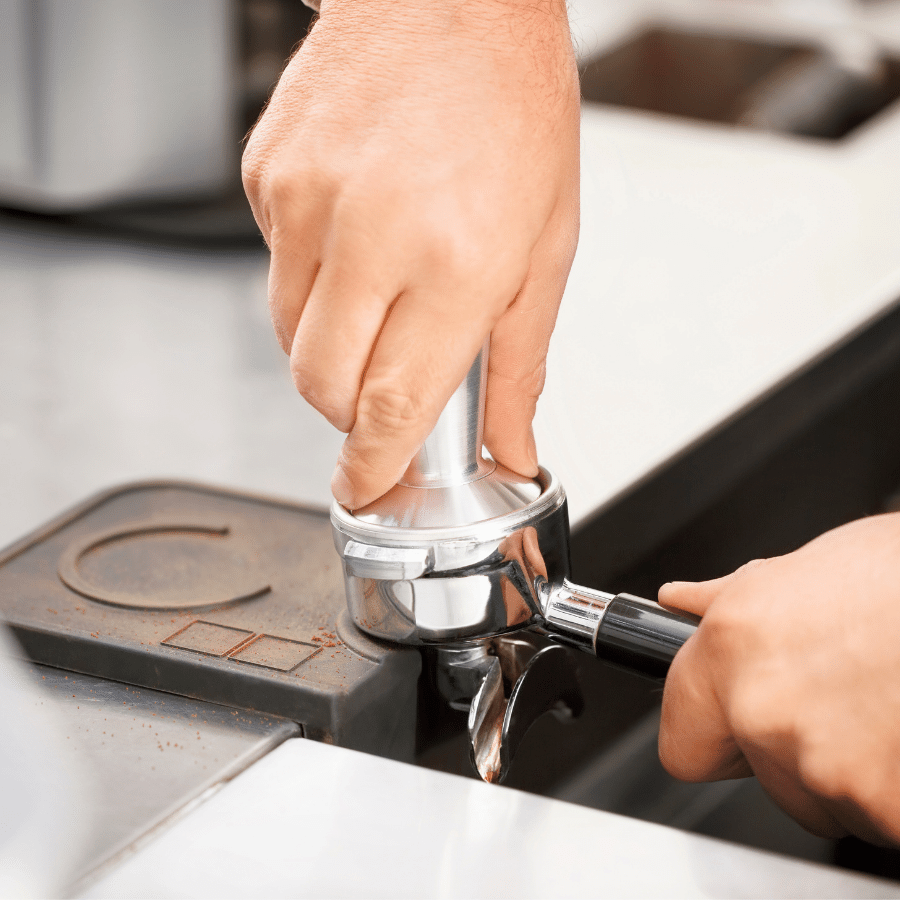
How much pressure you apply is not nearly as important as applying pressure evenly.
Once your coffee is tamped, you’re ready to brew!
4. Pull the Shot
Lock the portafilter into the group head. Now, we’re going to start the water flow.
Once the water begins flowing, you should see coffee dripping out of the portafilter within 10 seconds. The entire brewing process should take between 20 – 30 seconds, depending on your recipe.

Use a scale to measure the weight of coffee being brewed, and stop the water flow when you reach your desired weight. Use a timer to make sure your shot is pulled within the target time frame.
Some machines will allow for something called pre-infusion, either manually or automatically. This means introducing some water under a lower pressure for a few seconds before ramping up to the necessary 9 bars of pressure. This is similar to the “bloom” used in drip coffee brewing methods.
5. Dial in the Espresso Shot (Important)
It’s highly unlikely your first shot of espresso probably tastes the way you want it to. That’s ok!
Every barista, no matter how experienced, has to go through the process of dialing in espresso. This means adjusting your espresso recipe until you get the flavor you want.
The first place to start with dialing in espresso is by adjusting grind size. If your shot tastes overly bitter or took too long, you should grind coarser. If it took too faster and tasted sour (likely the first issue) you should grind finer.
Next, try adjusting your dose. If your coffee is too strong, use less grounds. Likewise, if it’s too weak, you can add more. I usually make dosing adjustments 1g at a time to prevent overcorrecting in my changes.
Don’t be afraid to also tweak your ratio. 1:2 and 1:3 are just guidelines, and you can change how much espresso you brew to try and get optimal flavor.
Pro tip: A bigger ratio uses more water, which extracts more flavor but creates a thinner mouthfeel. Less water in a smaller ratio can create an under-extracted shot with a thicker body.
The important thing to remember when dialing in is that flavor is king. The goal is to get espresso you enjoy, not adhering to rigid guidelines.
If you like the flavor of your espresso, congratulations, you’re done dialing in! That’s true even if your chosen recipe breaks a few of these “rules” for creating a good shot.
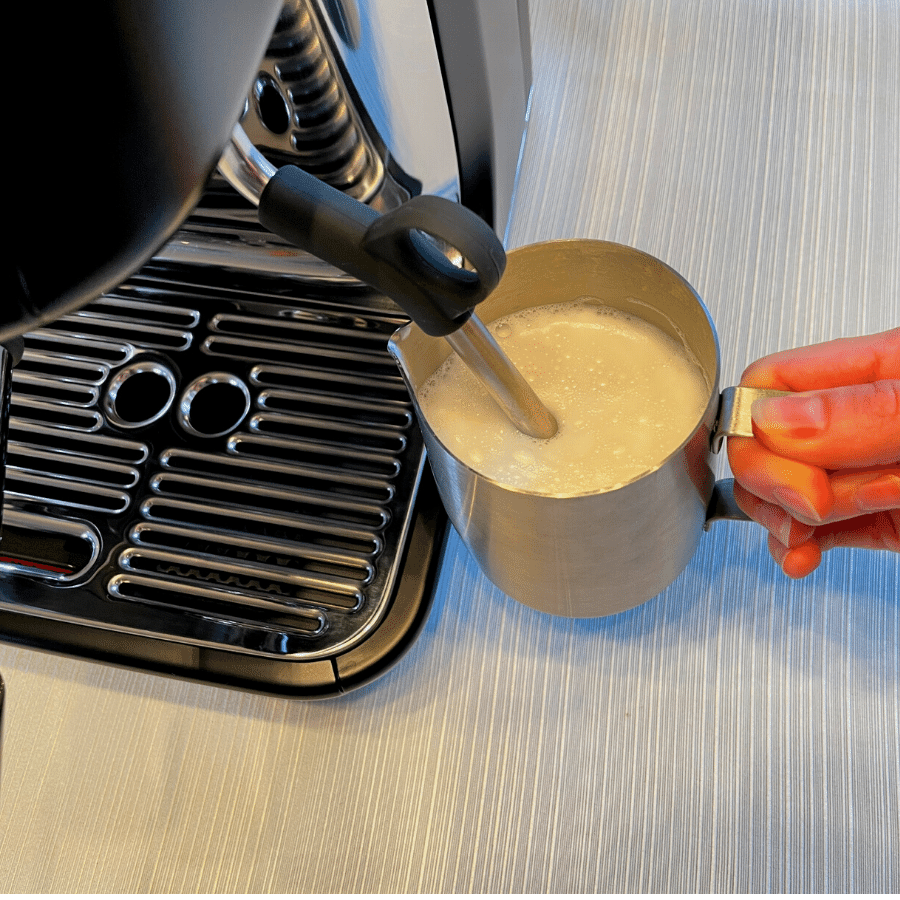
6. Froth and Steam Milk
Frothing, or steaming, milk takes a lot of practice but is so satisfying to get right. We have a separate article breaking down in detail how to steam milk, but here’s the short version:
- Purge the steam wand
- Fill the milk pitcher until milk is just above the bottom of the spout
- Pick a corner of the milk pitcher to insert the steam wand into
- Insert the steam wand into the milk pitcher so the tip is completely submerged
- Turn the steam wand all the way on
- Slowly lower the milk pitcher until the tip is only partially submerged – listen for the paper-tearing sound
- Let the paper-tearing sound continue for 3-4 seconds
- Resubmerge the steam wand
- Once the milk pitcher is too hot to touch, wait another 3-4 seconds and turn the steam wand off.
- Remove the milk pitcher and wipe the steam wand with a wet rag
- Purge the steam wand again
Like dialing in, steaming milk is a matter of preference. The “right” temperature and texture are the ones you enjoy the most. Getting good at steaming will help you get the perfect amount of foam and the right temperature for your chosen drink every single time.
7. Clean up the machine
You have to clean your espresso machine regularly to keep it functioning properly. We have a detailed guide on how to properly maintain an espresso machine, but there are some habits you can develop to keep everything in tip-top shape.
- Backflush regularly. Backflushing the machine removes oils, coffee grounds, and other grime from the brew head. It also cleans the piping just behind the group head and prevents a buildup of coffee grounds in the machine.
- Purge the group head. Briefly run the brew cycle after every shot to clear the brew head of coffee grounds. This not only maintains your machine but keeps old coffee from making its way into your next shot.
- Rinse the portafilter. After each shot, rinse the portafilter with warm water and wipe it down with a dry rag. This prevents a buildup of oils and coffee grounds and ensures each shot is brewed with only fresh grounds.
- Clean the grinder. If you have a grinder attached to your machine, vacuum out the exit chute and wipe the inside of the hopper each time you empty the grinder. This removes built-up oils inside the hopper and prevents clogging.
- Wash removable parts. Make sure that all accessories (tamps, filter baskets, shower screens, etc.) are also regularly cleaned. Check the manufacturer’s instructions on whether to hand wash or machine wash each part.
Get Great Ground Coffee
Half of brewing a good shot is proper puck prep, and that all starts with a good grinder. Read through our buying guide on the best espresso machines with a grinder to see how to get the most mileage out of just one piece of equipment.