Nespresso is a household name in the world of pod coffee, but most of their machines only brew black coffee. However, there are Nespresso Aeroccino milk frothers you can use for creating milk-based coffee drinks at home.
Nespresso has two milk frothers: Aeroccino 3 and 4. Aeroccino 3 has one setting for hot and cold milk foam. Meanwhile, the Aeroccino 4 has four settings, including three hot milk settings that make different textures based on your preference. It also has a more ergonomic design and is dishwasher safe at a modest premium.
I recommend the Aeroccino 4 for extra texture settings and easier pour. I’ll include all the details on these milk frothers, so you can choose the best Aeroccino milk frother for your lattes and cappuccinos.

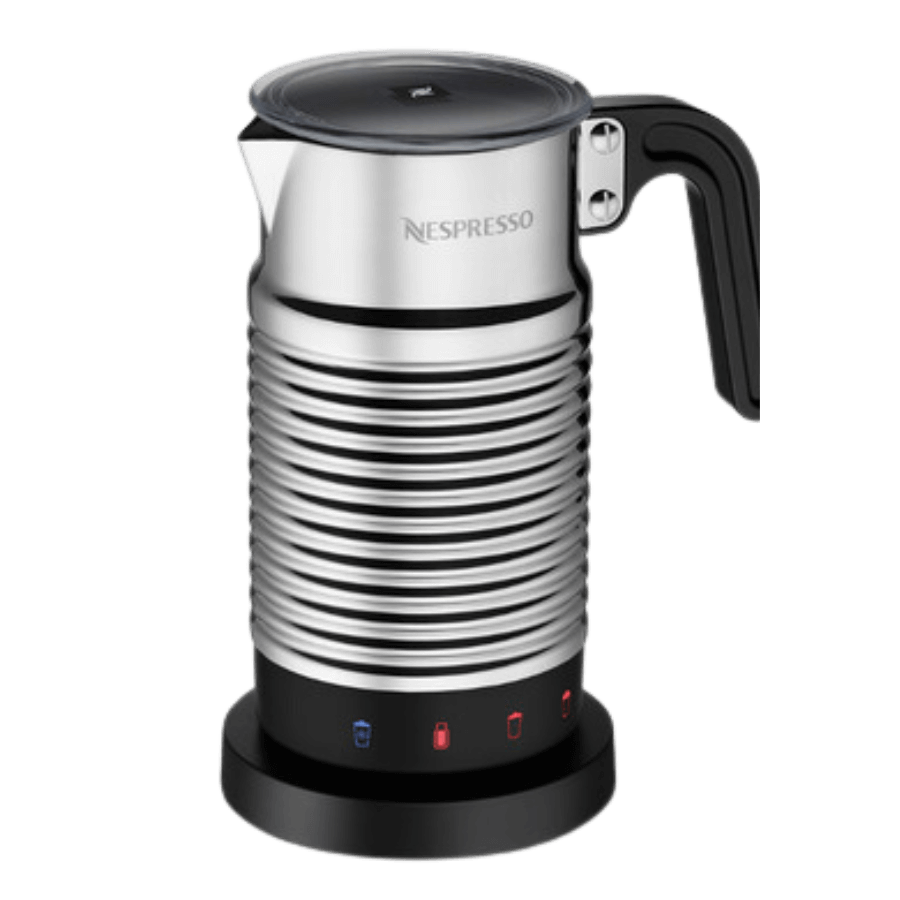
What Is An Aeroccino?
Aeroccino is a milk frother series by Nespresso. These milk frothers were made to accompany their capsule espresso machines since most Nespresso machines don’t have integrated milk frothing. The series consists of Aeroccino Plus (discontinued), Aeroccino 3, and Aeroccino 4.
Each Aeroccino has three parts: base, frother, and whisk. The frother sits on the base, which plugs into the wall and delivers electricity to the frother. The small whisk is magnetic and connects to a small prong inside the frother.
When you turn on the Aeroccino, the base delivers induction heat to the frother and spins the magnetic whisk rapidly. The whisk has a metal spring around it that whips air into the milk.
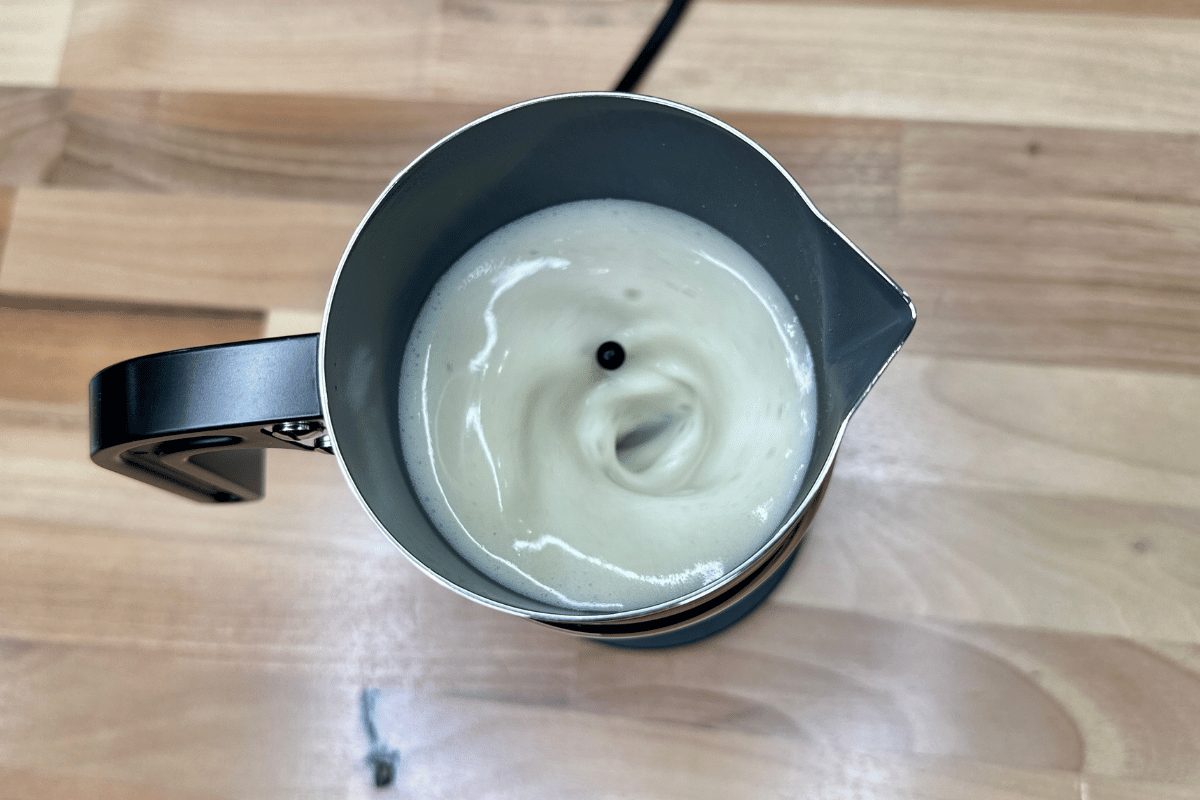
That rapid whipping creates the milk frothing temperature and makes the milk nice and dense with lots of small air bubbles (aka a perfect microfoam). The Aeroccino froths until the milk reaches 150-160 F, which takes 60-90 seconds.
Essentially, just as Nespresso machines produce coffee with a push of a button, Aeroccinos froth milk the same way. Pour the milk, press a button, and Aeroccino will do all the work.
Feature Comparison Between Nespresso Aeroccino 3 vs. 4
Design
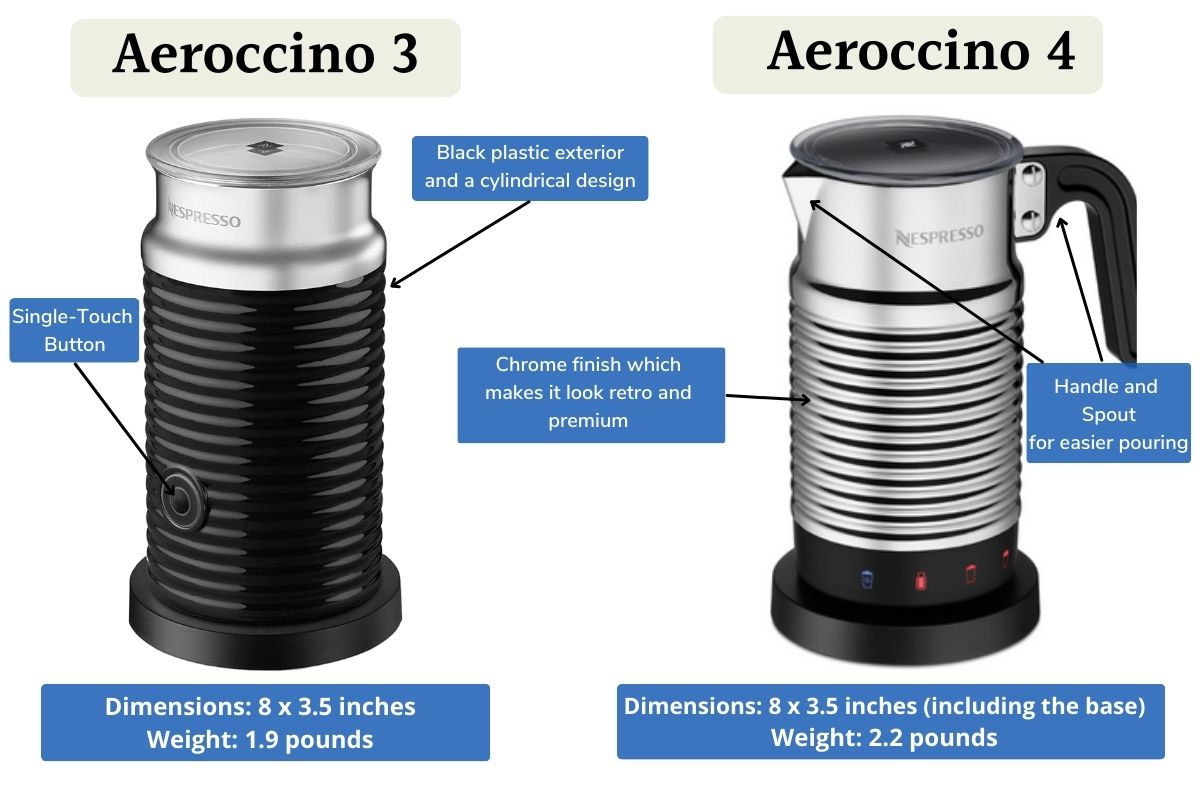
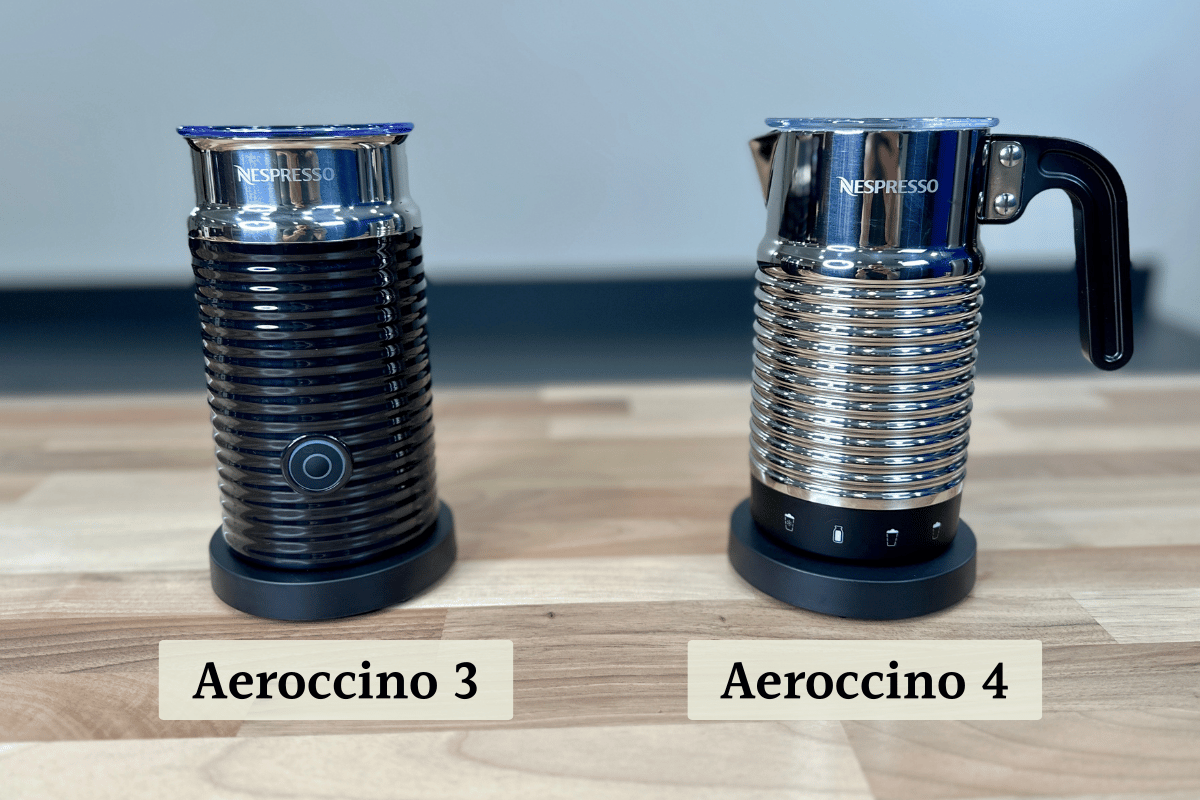
Design-wise, Nespresso Aeroccino 3 and 4 looks quite different. Nespresso Aeroccino 3 has a black plastic exterior and a cylindrical design. It doesn’t look like a milk frother. I even had friends over who asked what’s the black robot-like thing on my kitchen counter.
On the other hand, the Aeroccino 4 looks like a milk jug. It has a handle and distinct spout, which makes it more comfortable and easier to use. You can easily pour out your coffee with the spout, which allows you to pour latte art. The Aeroccino 4 has a chrome finish, which makes it look retro and premium.
On the other hand, it’s slightly heavier than Aeroccino 3. Here are the exact dimensions and weight.
- Aeroccino 3: 1.9 pounds and 8 x 3.5 inches
- Aeroccino 4: 2.2 pounds and 8 x 3.5 inches (including the base)
Overall, Nespresso Aeroccino 3 has a simpler design. The pitcher is made of stainless steel, but the plastic casing makes it feel less durable. The base is flush with the cylinder and mostly invisible. The frother has a single button that you press to create hot or cold milk froth (it glows red for hot milk and blue for cold milk froth). It does not have a spout, so I had to be more careful when pouring.
Aeroccino 4 feels more premium and durable because it has stainless steel casing, and the handle and spout make the pouring easier. The refreshed design is now almost identical in size to the Aeroccino 3 too.
The Aeroccino 4 has four buttons on the frother to indicate the different texture settings. The buttons have coffee cup illustrations, making it extra easy to use.
Both bases have non-slip rubber pads underneath, which is a great touch by Nespresso. That added friction is nice when you’re trying to fit a full frother on a slick or wet countertop.
Aeroccino 4 refresh: what’s changed recently
Nespresso recently redesigned the Aeroccino 4, which is now called the Aeroccino 4 refresh. The biggest change is moving the buttons from the base onto the frother itself. The buttons are also built into the frother and are more of a touch than a press.
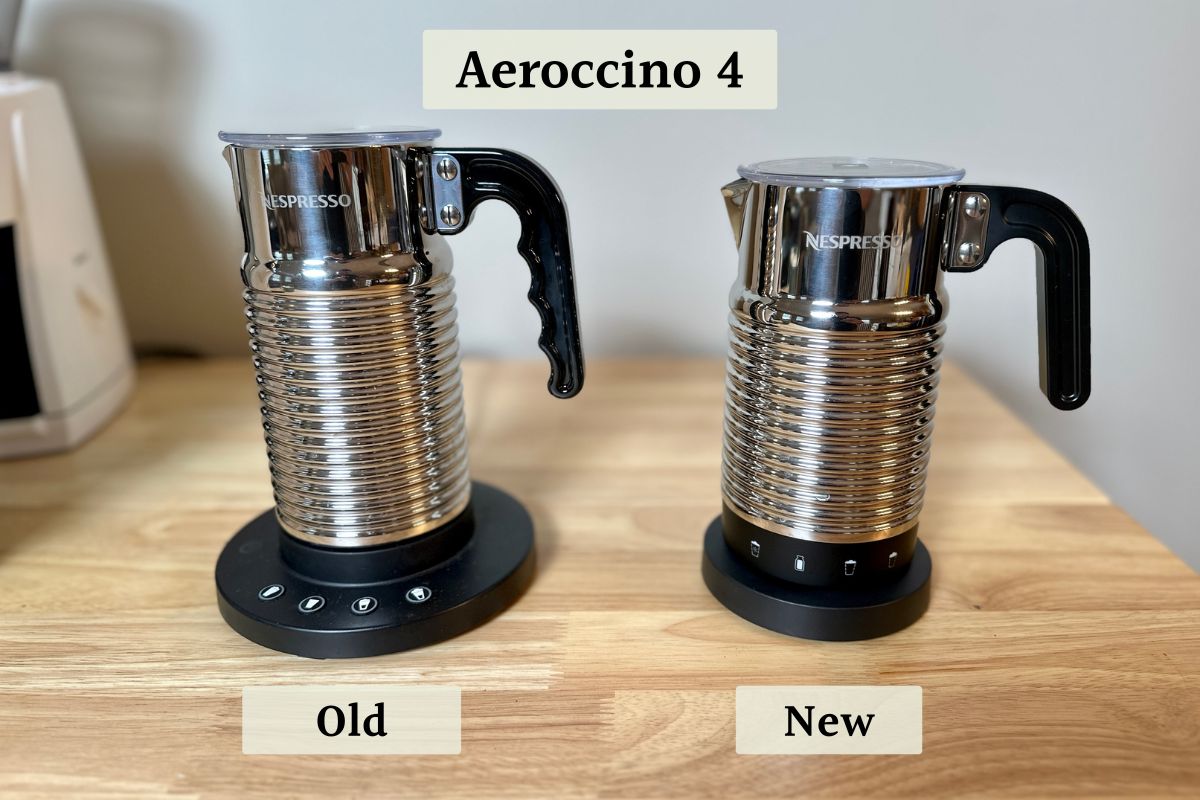
The function and frothing settings have remained the same in the refresh. You still have four settings, including three different hot milk textures, which is the main selling point of this model.
I am really happy Nespresso updated the design, which makes the Aeroccino 4 even slimmer. The wide base was the main shortcoming of the old Aeroccino 4, as it took up more counter space than the Aeroccino 3. Nespresso managed to shrink the base while reducing the height too. The refresh model fits nicely next to my other Nespresso and espresso machines.
Milk Frothing Options
The biggest difference between Nespresso Aeroccino 3 and 4 is their milk frothing options, where the Aeroccino 4 has more settings than the Aeroccino 3.
The Nespresso Aeroccino 3 has only one setting for hot milk. This setting is powerful and creates a dense froth for cappuccinos.
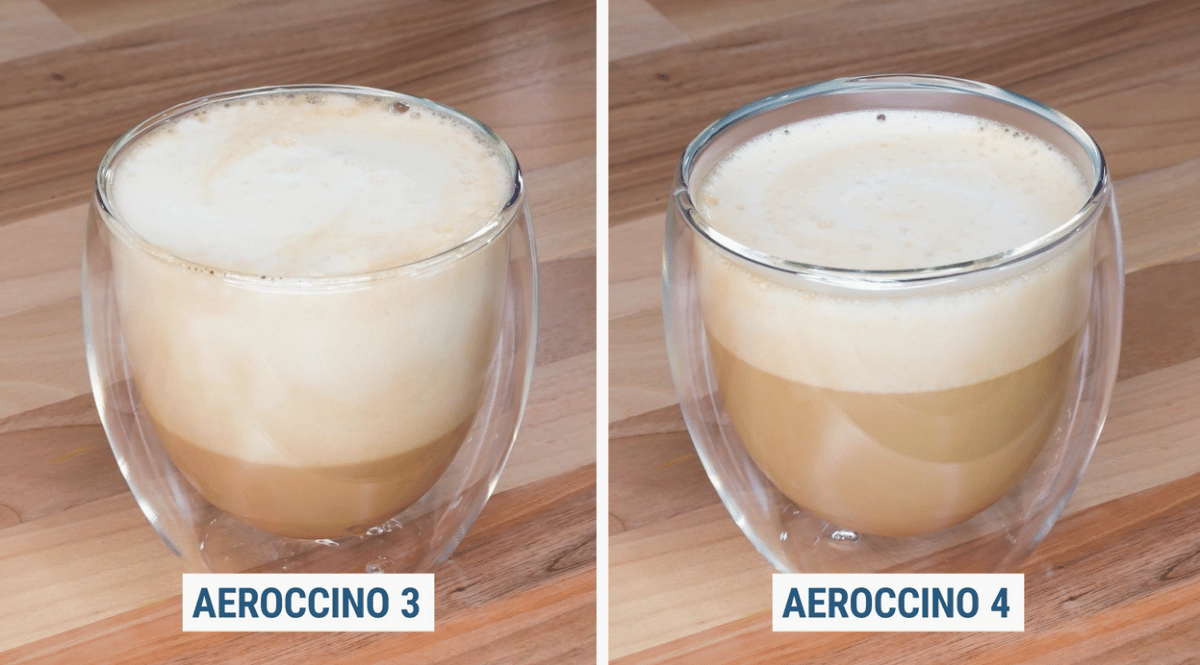
The hot milk lone setting is the downside of this model. You can also hold the button for a cold foam, which spins the whisk for about 90 seconds with no heat (this also creates a dense texture).
It is easy to operate this model: press the button for one second for hot milk. The button will turn red, and the whisk will start spinning as the inner material heats the milk. The Aeroccino whisk will spin and froth until the milk reaches around 150-160 F, and turn off. To make cold froth, press the button for two seconds. The button will turn blue and turn off once the milk is done.
Meanwhile, the Aeroccino 4 has four milk texture options:
- Cold milk foam
- Hot milk froth
- Latte macchiato
- Cappuccino
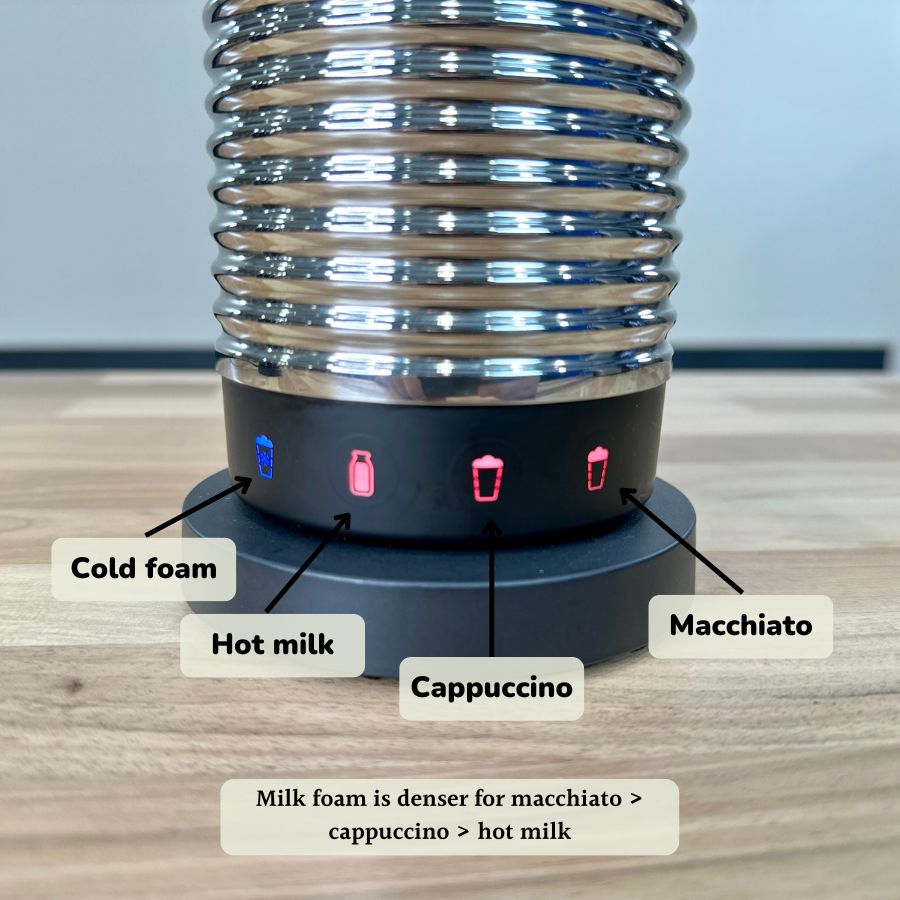
Each button on the Aeroccino 4 base corresponds to one style of froth. This makes the Aeroccino 4 more versatile, and you can prepare a wider range of milk-based coffee drinks.
You can see how different the milk settings turn out:
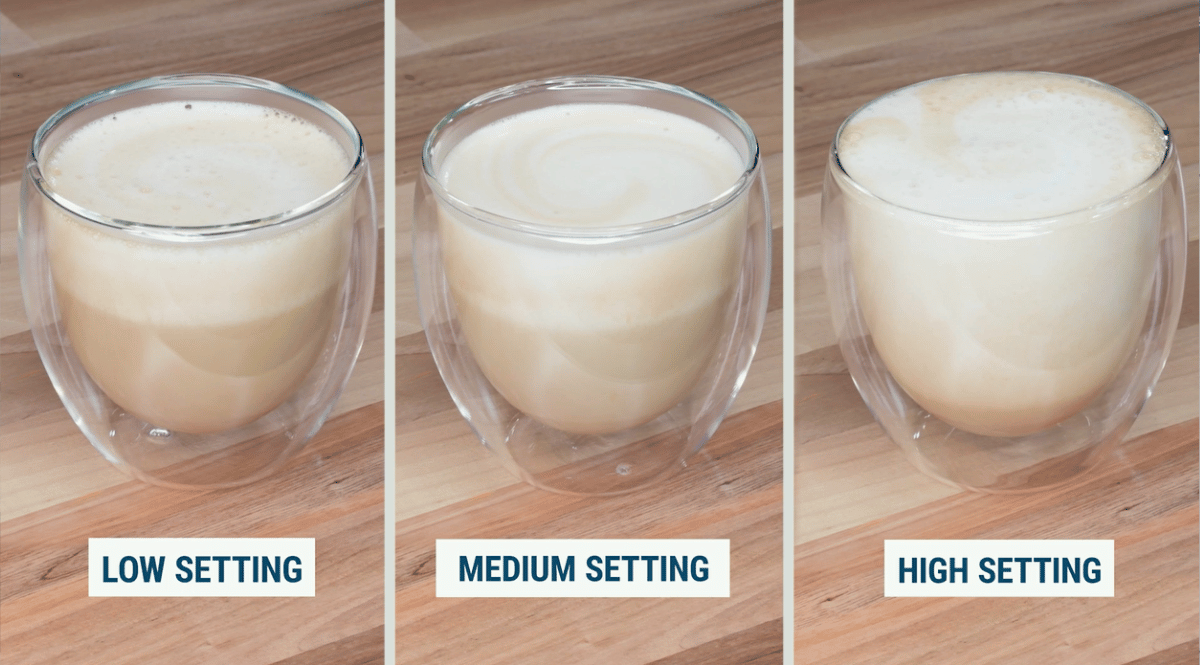
There is a clear difference in the low, medium, and high setting. The really nice thing about having different settings is you can choose different textures for different milks. For example, these lattes use oat milk, which froths less than whole milk yet more than skim milk.
I typically use the low setting for hot milk, which creates a smoother and creamier texture that I enjoy.
However, you can modify the Aeroccino 3 a little. The whisk has two springs, and you can take off the lower spring to create a “low” texture setting. The problem is that this texture was really low and felt like heated milk.
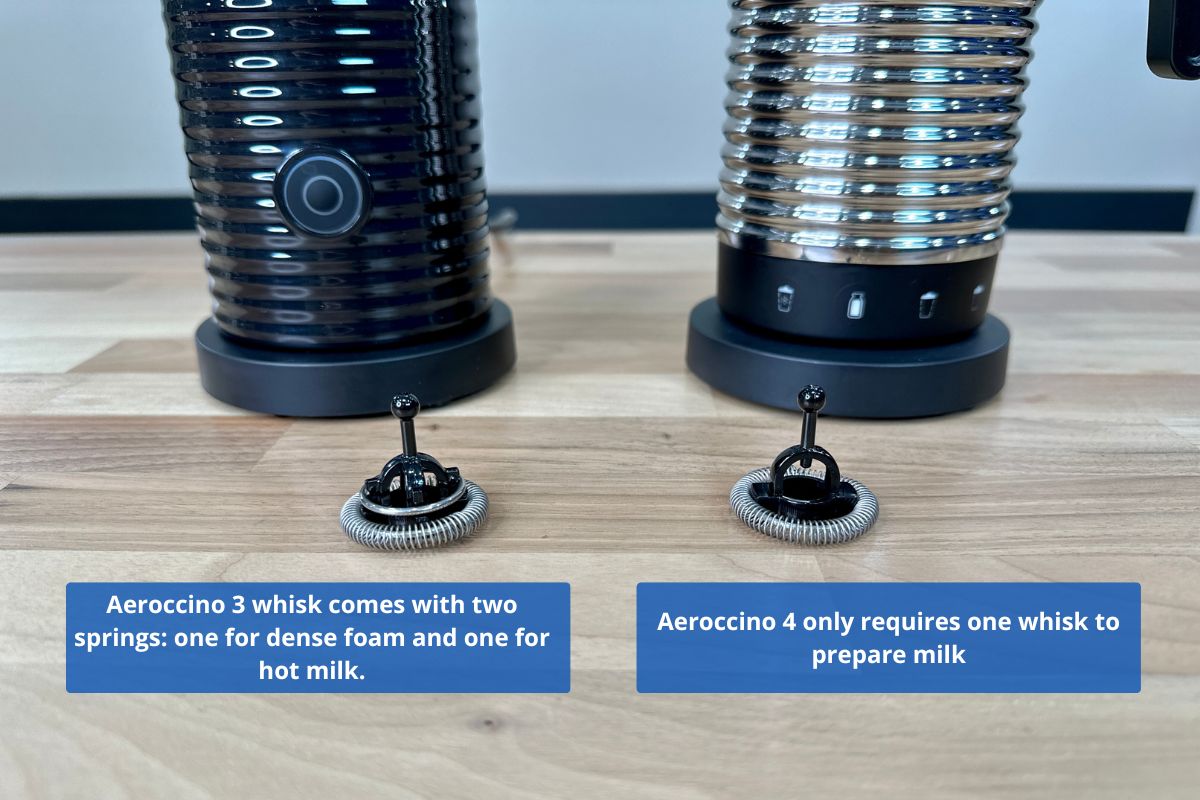
Meanwhile, you don’t need to mess around with the spring on Aeroccino 4. The different buttons change the whisk speed to get different foam rather than modifying the whisk itself.
Both Nespresso Aeroccino milk frothers have two max indicator lines. The first line marks 4 oz and the second indicator line marks 8 oz.
Less milk will lead to a denser foam, so use the 4oz setting for drinks like macchiatos and cappuccinos. Meanwhile, a high amount of milk can’t forth as much, so the 8 oz setting is for drinks that need hot milk with light foam.
Be careful how much you froth at the high level because the milk frother will overflow with a lot of milk at a high setting!
Cleaning and Maintenance
Aeroccino 4 wins in terms of ease of cleaning and maintenance. Nespresso Aeroccino 3 isn’t dishwasher safe, but Aeroccino 4 is. Aeroccino 3 has a plastic housing, and the heat from the dishwasher can release harmful chemicals. You have to handwash the Nespresso Aeroccino 3 every time you use it.
Admittedly, you can get it by rinsing it out after each use. But, if you’re like me, cleaning up after drinking my morning dose of caffeine is the last thing you want to do, and dishwasher compatibility takes this away.
Everything on the Aeroccino 4 is dishwasher safe, except the base. However, Nespresso suggests the highest temperature of 158 F when using the dishwasher.
Interior Material and Durability
Both Nespresso Aeroccino 3 and 4 heat milk using induction through their base materials, which are different for each. Nespresso Aeroccino 3 has a non-stick Teflon surface that’s easy to clean up. However, it wears down over time. You’ll notice it starts to peel off, like what happens to the non-stick Teflon coating on pots and pans.
Nespresso Aeroccino 4 interior coating is a ceramic non-stick coating that is more resilient and won’t tear over time. It won’t peel off and is more durable compared to Teflon.
Value
My vote for the best value goes to Aeroccino 4. You get a dishwasher-safe milk frother that can create various levels of milk froth for a little more than Aeroccino 3. I love the hot milk setting, which produces the best texture of milk. Plus, the spout makes it easier to work on your latte art skills. Moreover, the Aeroccino 4 milk frother is more durable thanks to the stainless steel exterior and ceramic interior, and it’s easier to maintain because it’s dishwasher safe.
The Aeroccino 3 is a fine option if you only like dense cappuccino foam, as this is what it excels at. It will still save time and mess compared to using a steam wand.
How Does Aeroccino Milk Frother Compare To A Traditional Steam Wand?

The Nespresso Aeroccino 3 and 4 are much easier to use than a traditional steam wand. Just pour in the milk and push a button. Plus, the steam wand adds water to the milk, which doesn’t happen with a frother.
However, the Aeroccinos don’t provide the same level of control and customization as a traditional wand. Using a steam wand is a learning curve, but you can deliver the perfect aeration and stretch the milk exactly to your liking. That matters as different milk (dairy, oat, etc) froth differently, and a solid heating element can produce some excellent steam for microfoam.
You’ll get a good consistency on a milk frother, but it’s limited to the device settings. I also noticed that the milk comes out very hot on the Nespresso Aeroccino 3 — about 150-160 F, while you want 140-150 F max for steamed milk.
Overall, you have much less control over the Aeroccino than a traditional wand. You can’t determine the milk texture or the quality of the foam.
On the other hand, you have a higher level of control with a steam wand, which means a higher chance of achieving microfoam perfection. However, this has a learning curve, and you’ll probably spend months perfecting your latte art.
Recommendation and Which Aeroccino Is For You
Nespresso Aeroccino 3 milk frother is a good option if you’re on a budget and like dense foam. If you don’t mind swapping out the two whisks, you also won’t mind it.
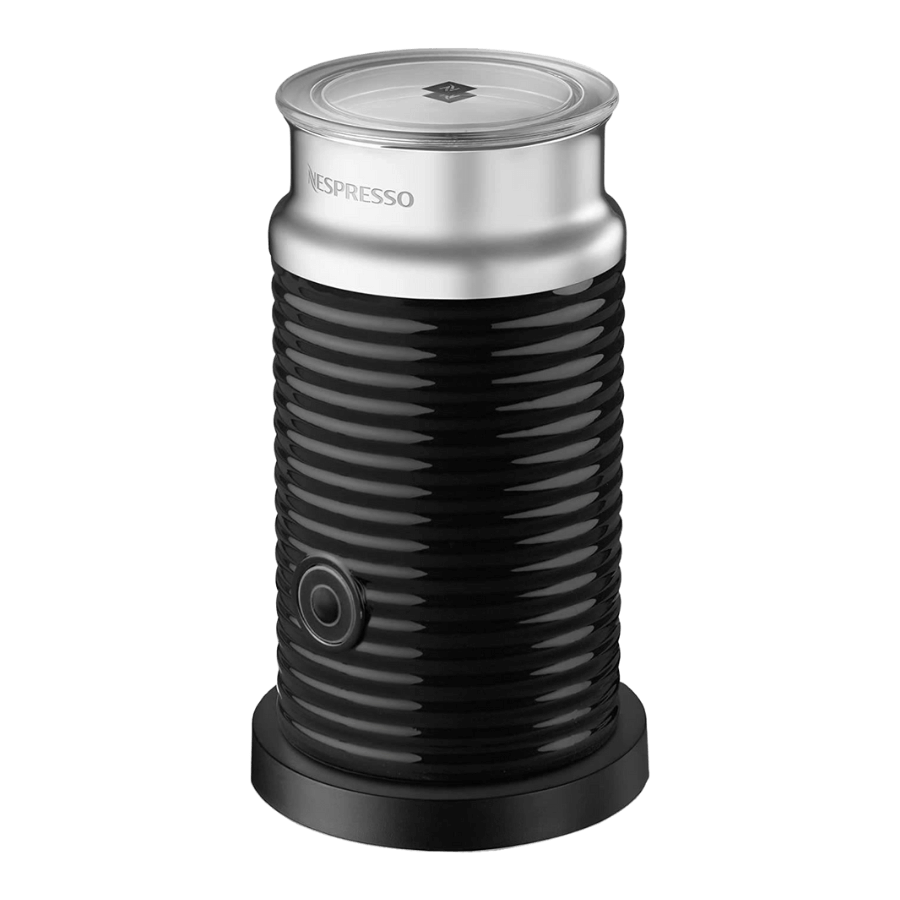
Nespresso Aeroccino 3 highlights:
- Budget Friendly
- Ease of Use
- Single Button
Nespresso Aeroccino 4 milk frother is my pick. It’s a good option if you have slightly more room in your budget and want a more durable option. This is also a better choice if you don’t want to clean the milk frother by hand and want more options for froth milk — both cold and hot froth and dense and light foam.

Nespresso Aeroccino 4 highlights:
- Durable
- Dishwasher safe
- More options for froth milk
Nespresso Aeroccino 3 vs. 4 Milk Frother: Final Thoughts
Nespresso Aeroccino milk frother is a great choice if you like to drink milk-based coffee drinks. Nespresso Aeroccino 3 is a good option if you want just frothed milk and don’t plan to create latte art. Nespresso Aeroccino 4 is a good option if you want to froth milk for lattes and to work on some basic latte art skills.
If you’re looking for a new Nespresso machine, check out our comparison of the best Nespresso machines.

