Rich, creamy, foamed milk is an essential ingredient in a litany of coffee drinks. Learning to steam milk on an espresso machine, however, can be frustrating as it requires proper technique.
Throughout my career working in cafes, I’ve had to steam milk for thousands of lattes, cappuccinos, and cortados. I trained new baristas in a cafe and learned important principles to get a properly textured steamed milk.
In this milk steaming guide, I’ll explain the importance of wand placement and aeration time, as well as some tips for steaming non-dairy milk to help you learn to make lattes like a professional barista.
How to Steam Milk
There are many different milk-based espresso drinks, but the basic principles of frothing milk for all these drinks remain the same:
- Insert the steam wand into one corner of the milk pitcher
- Fully submerge the steam wand tip in the milk
- Turn on the steam wand
- Slowly lower the milk pitcher until the steam wand tip is only partially submerged.
- Let the milk “sip” air for several seconds.
- Resubmerge the steam wand tip.
- Heat the milk to the desired temperature
- Turn off the steam wand
- Remove the milk pitcher and wipe down the steam wand
- Purge the steam wand.
You can tweak your process to make a coffee beverage how you like. For example, I prefer a wet cappuccino with little foam, but plenty of people prefer a dry cappuccino with lots of large, foamy bubbles. The above technique is the same, and what differs will be how long and intensely you aerate the milk.
Let’s explore these steps in a little more detail.
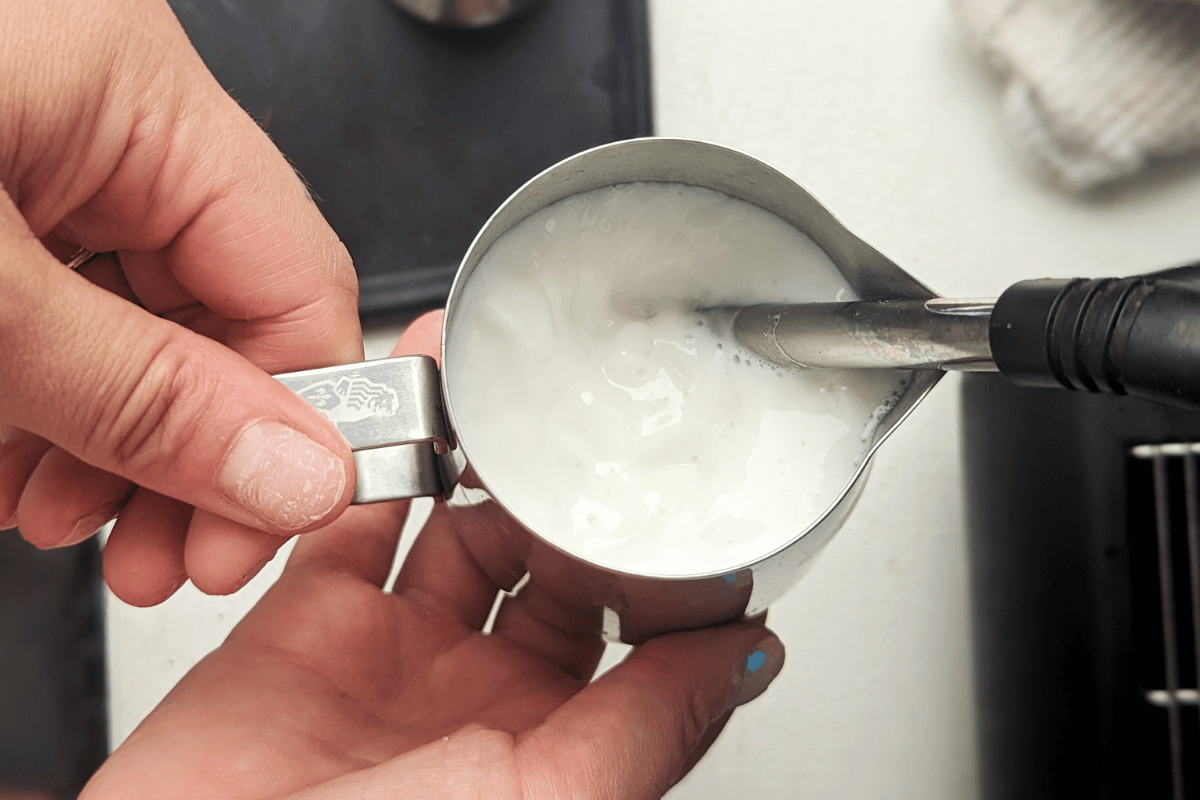
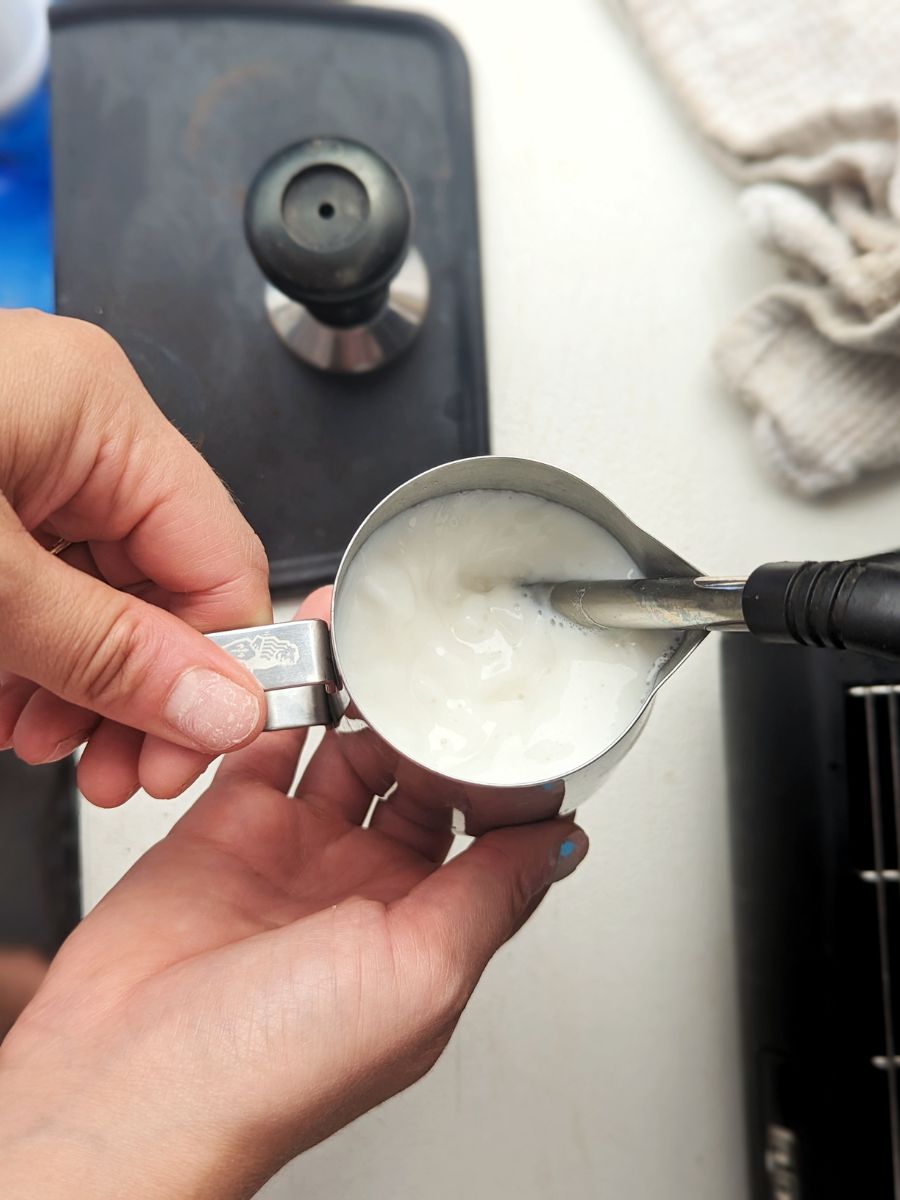
First, when you insert the steam wand into the milk, never put the wand in the center of the pitcher. Instead, put the wand into one of the four quadrants, or corners, of your milk pitcher.

When I steam milk, I prefer to place the steam wand slightly to the left or right of the pour spout at the front of the pitcher. This proper placement will cause the milk to move in a whirlpool motion once you turn the steam wand on, which ensures the milk heats and aerates evenly. You can also tilt your pitcher slightly towards the corner where you’ve placed the steam wand for even better milk rotation.
Once you’ve picked the proper placement, be sure to insert the wand so that the entire tip is submerged under the milk. Once you turn the wand on, the steam will force milk up the sides of the pitcher, causing the level of milk to drop toward the center of the pitcher. Submerging the whole steam wand in the milk makes sure you don’t accidentally start aerating the milk once this drop happens.
Next, turn the steam wand on. On some espresso machines, this is simply an on/off lever or button. Others allow you to slowly increase the steam pressure by rotating a knob or lowering a lever to open the steam valve. Make sure you open the steam valve all the way right away. Even aeration will come from good technique, not from a slow introduction of steam pressure.

Once the steam wand is on, you will hear a loud whining sound from the milk. Don’t let this screeching startle you, and resist the urge to jerk the milk pitcher down. Instead, slowly lower the pitcher until the tip of the steam wand is slightly above the surface of the milk.
Once you reach the right spot, the whining sound will turn into a ripping noise, and it will sound a lot like paper tearing. This is the sound of air being introduced to the milk.
This part of the steaming process is called “aeration,” and it’s how foam is created in the milk. The best way to think about aeration is to imagine that air is a hot cup of coffee, and the milk is trying to take a drink. If you try to gulp down a hot coffee, you’ll burn yourself. If your milk tries to “gulp” air, it will ruin the milk texture. Instead, just like you have to sip on a hot coffee, the milk has to “sip” on the air to keep too much air from being introduced at once.
The paper tearing sound means you’re sipping, not gulping air. So, once you hear that sound, stop lowering the milk pitcher. Keep the pitcher still to let the milk sip for a few seconds until the whining sound quiets down. Foam works as a sound insulator, so it is a good sign if the frothing steadily becomes quieter.
If you want more foam, you can either let the milk sip air for longer, or you can slightly lower the pitcher even more to create bigger sips to create bigger foam bubbles.
After a few seconds, resubmerge the steam wand tip completely in the milk. The milk is sufficiently aerated, and now the focus is on getting the milk to the right temperature. While there are milk frothing thermometers that will give you exact temperature readings, you can also get the correct temperature by feel. If you hold the handle of the milk pitcher with one hand, you can use the other to feel the outside of the pitcher.
Once the pitcher gets hot enough that it feels uncomfortable to the touch, turn off the steam wand. This temperature should be appropriate for both lattes and cappuccinos. However, you might want to steam the milk a little cooler for smaller drinks (like cortados). If you prefer hotter milk, follow the same process as before, but remove your hand from the pitcher once it gets too hot to touch and wait several more seconds before turning off the steam wand.
I’ve found a temperature between 140 to 160 degrees Fahrenheit is best for steamed milk.
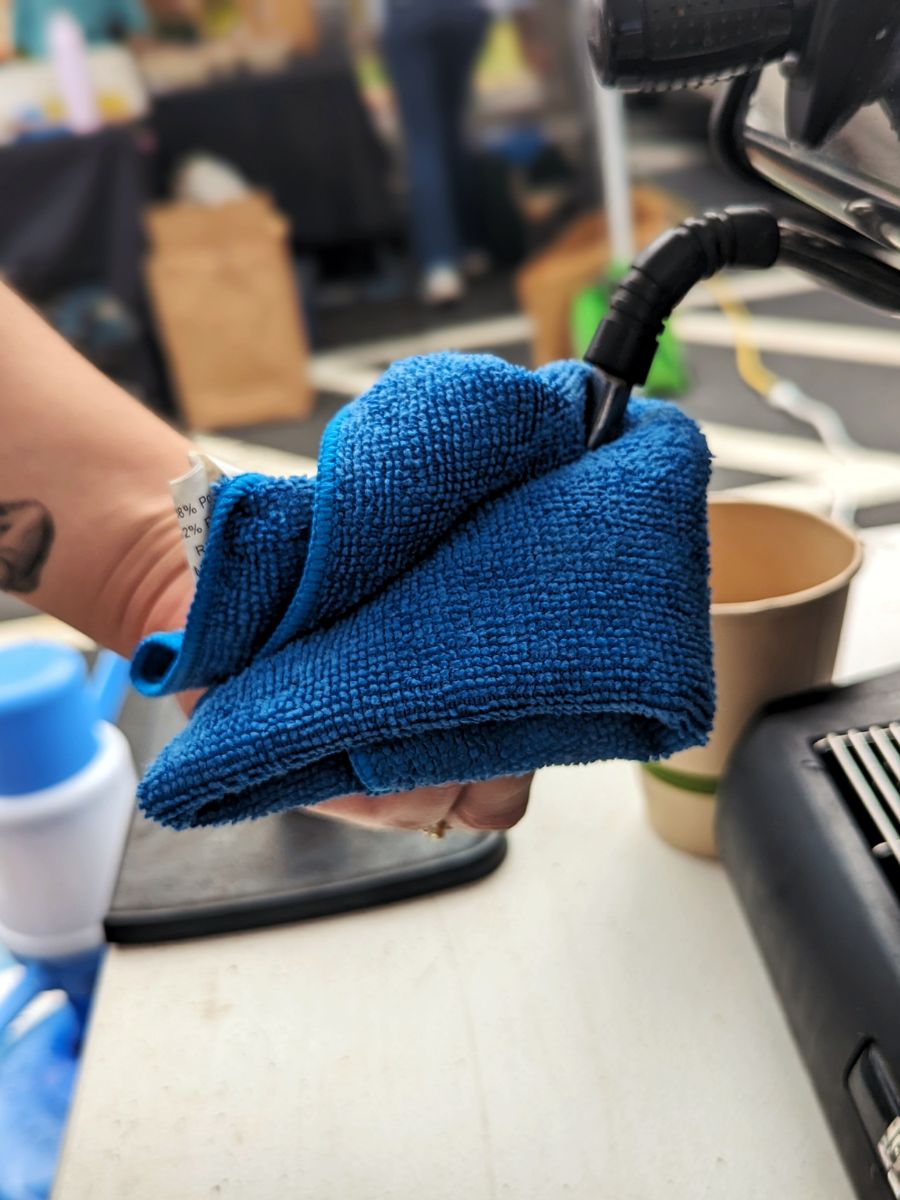
Wait until the steam wand is completely off before you remove it from the milk. If you try to remove the steam wand too soon, residual steam will force air into the milk and ruin the texture you’ve just created.
Once the wand is removed, immediately wipe the steam wand with a wet rag. This prevents hot milk from getting caked onto the wand and extends the life of your espresso machine. Then, briefly turn the steam wand back on. This purges any milk that might have been sucked into the machine and keeps the inside of the wand clean.
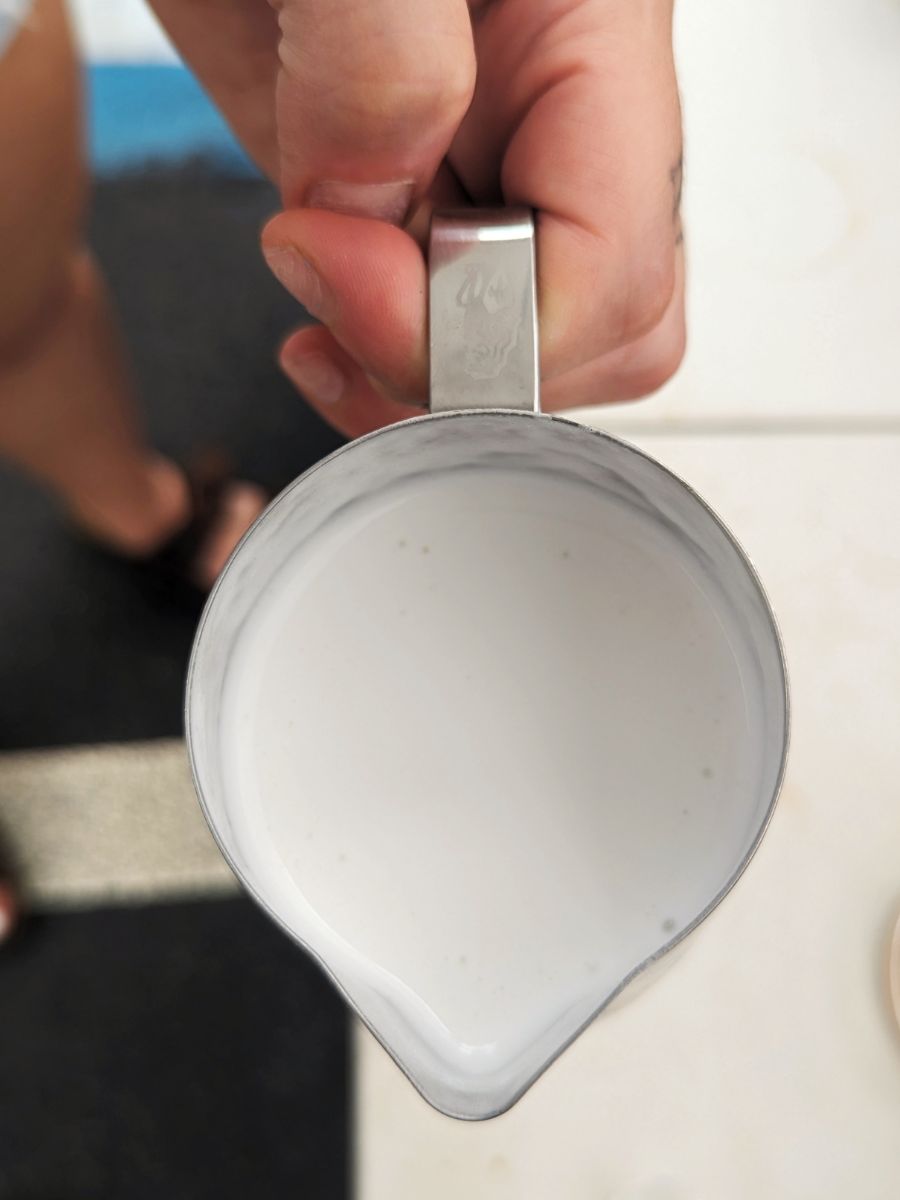
Tap the finished milk pitcher gently on the counter to pop any large bubbles. This is called “polishing” your milk. Properly steamed milk should have a texture that looks similar to wet paint or melted ice cream. This comes from the microfoam, which is made up of thousands of very small bubbles created by the introduction of air.
Microfoam is difficult to see unless you look very closely. Your milk should not have many large, visible bubbles on the surface (unless you purposefully aerated the milk more to create the foam texture you prefer).
Once you’ve purged the steam wand and polished your milk, you’re ready to pour it over an espresso shot to make your drink of choice!
How to Steam Alternative Milks
The main difference between frothing milk with dairy and frothing plant-based milks is the amount of time you spend aerating the milk. All the other steps in the process are the same, but different milks require different aeration times because of the varying fat contents, as more fat makes milk more prone to producing foam. Whole milk requires the least aeration time, while oat and almost milk take longer.
Soy Milk: This milk is prone to producing a lot of foam, so don’t introduce air too early, and don’t introduce air for very long. Turn on the steam wand, wait a few seconds, and then let the milk sip air for just a second or two.
Oat Milk: Oat milk is low in fat content, which means it has a hard time creating foam. Introduce air early, and let aeration happen for a longer time to get a good texture.
Almond Milk: Just like oat milk, almond milk has a watery texture that’s low in fat. Spend a few more seconds on aeration than you would for dairy milk to create a better microfoam.
Of course, the best way to learn to steam alternative milks is to practice! Trial and error is a great teacher when it comes to steaming milk, so don’t be afraid to experiment with your technique to see what creates a milk texture that you enjoy most.
Pouring Latte Art
Latte art is created by getting milk foam to sit on top of an espresso shot in a symmetrical pattern. You do this by pouring the milk into the espresso in two stages: an incorporating pour and the art pours.
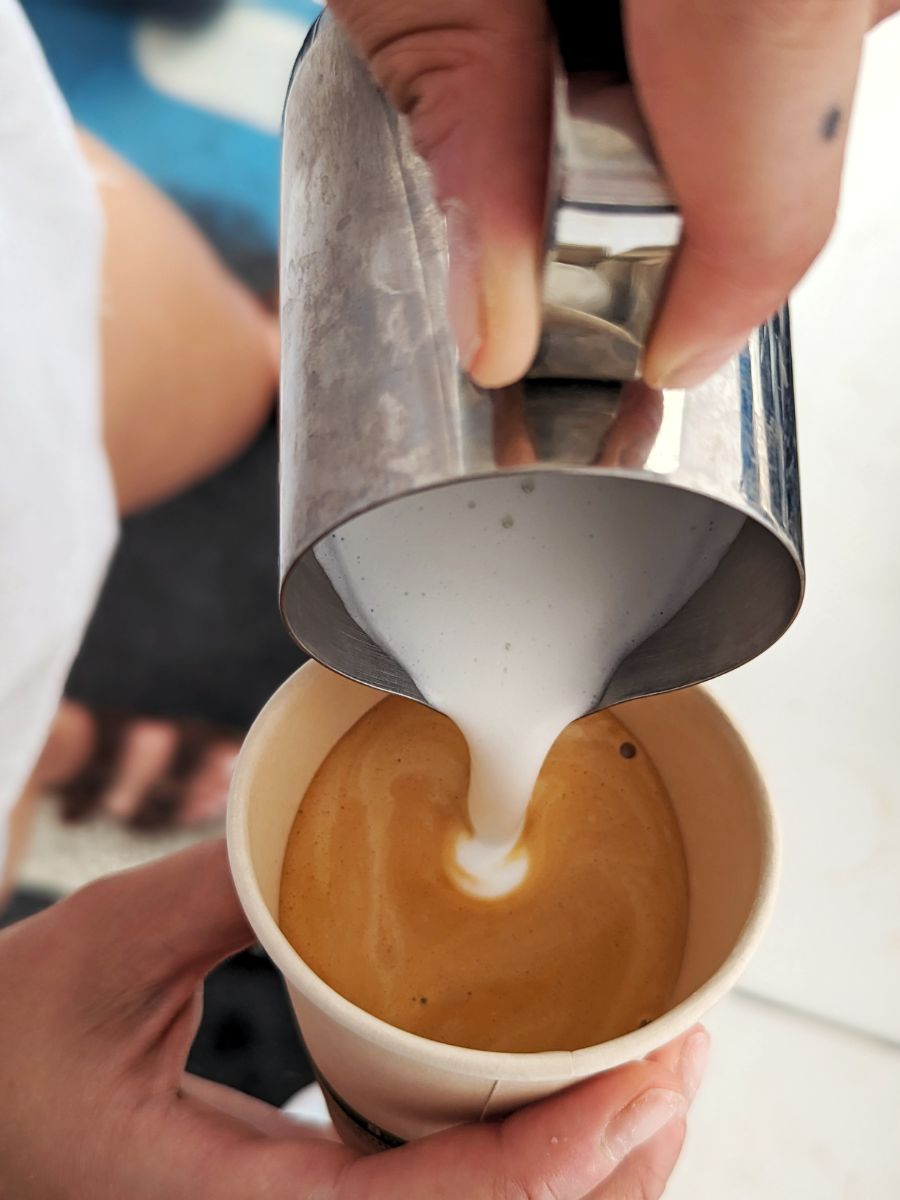
The incorporating pour lets the majority of the milk mix with the espresso as the cup fills near the top. This pour should not create art. Hold the pitcher above the cup, tilting the cup slightly towards the pitcher. Pour a thin stream of milk while holding the pitcher high above the cup. This “high and thin” technique allows the milk to dive under the crema and mix with the body of the shot without letting the foam settle on top.
When you’ve almost filled the cup, stop your pour. Then, move the pitcher down so that it is almost touching the lip of the cup. From this low position, pour a heavy stream of milk. Done correctly, the foam should settle on top of the cream. Tilt the cup backward as you pour so you don’t spill the coffee as the cup fills.
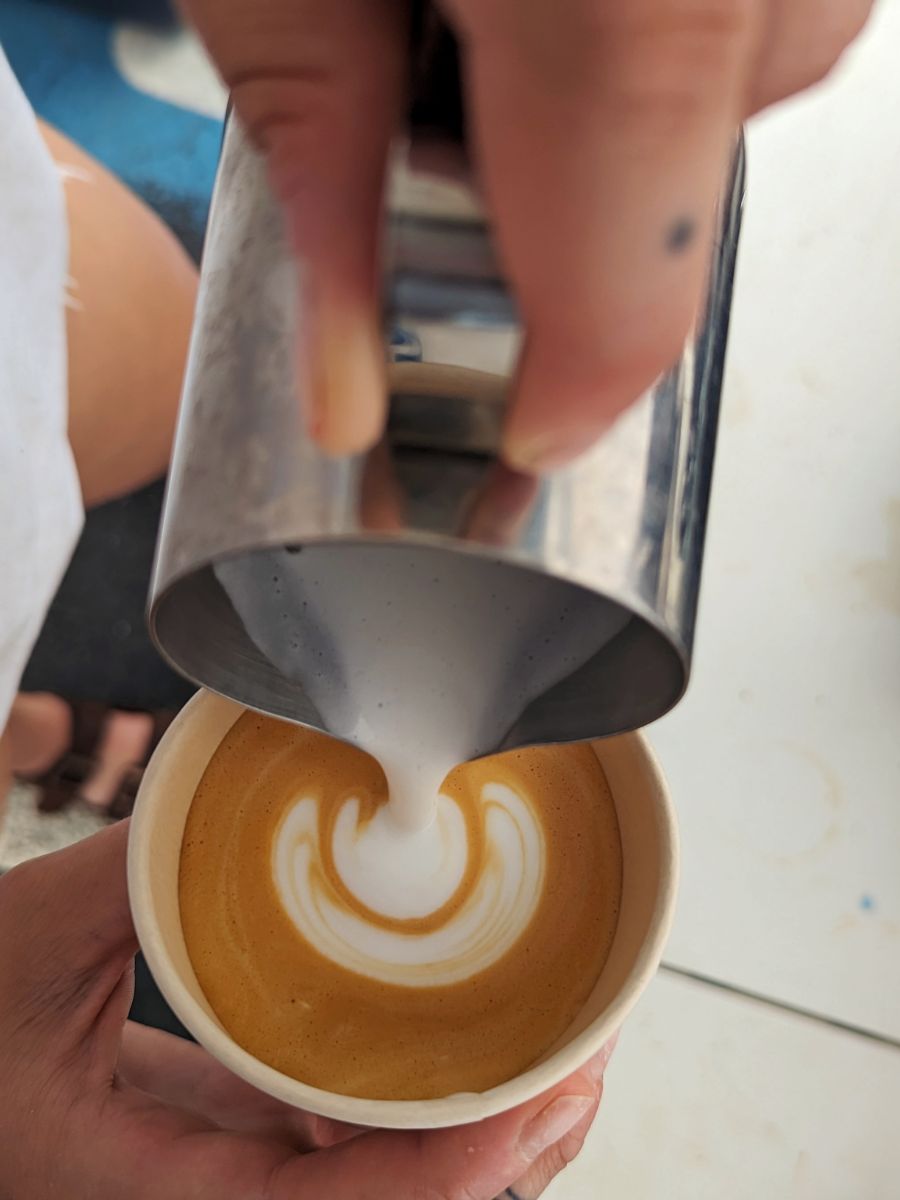
When the cup is full, return to a high and thin pour and move across the cup to “cut” the design, making a symmetrical heart.
To recap, these are the basic steps to create a simple latte art heart:
- Start with a high and thin pour
- When the cup is almost full, stop pouring
- Use a low and heavy pour to settle foam on the crema
- At the end, return to a high and thin pour to finish the latte art
For a visual aid, check out this video.
Frothing Milk Without a Steam Wand
If your espresso machine doesn’t have a steam wand, you can still froth milk using different methods. For all of the following options, begin by heating milk to your desired temperature on a stovetop or in the microwave.
Frothing Wand: Perhaps the easiest method to use to froth milk without a steam wand, a frothing wand is a small electric whisk that you simply insert in the milk and turn on for several seconds. The spinning motion of the wand aerates milk by introducing air bubbles without the use of steam.
French Press: The metal filter of a French press can aerate milk in the same way a frothing wand does. Pour the heated milk into a French press, attach the lid, and rapidly raise and lower the attached plunger. By displacing the milk rapidly and forcefully, you allow small air bubbles to form. Do this long enough, and it will create a microfoam through the milk.
Hand Frothing: If all else fails, a whisk and a little elbow grease will also get the job done. Whisking hot milk will introduce air like a frothing wand, and if you hold the whisk between your palms and rub your hands together, you can create enough circular motion to quickly create a microfoam.
The Right Tool for the Job
Good foamed milk is only half the battle in creating the perfect coffee beverage. Read through our roundup of beginner-friendly espresso machines to find the perfect espresso machine for brewing the perfect shot to pair with your steamed milk.