The quest for a perfect cup of espresso never ends. Many elements make a flavorful brew, but coffee distribution is often overlooked. Unevenly distributed grounds in the portafilter can lead to channeling, which results in uneven extraction and a bad brew.
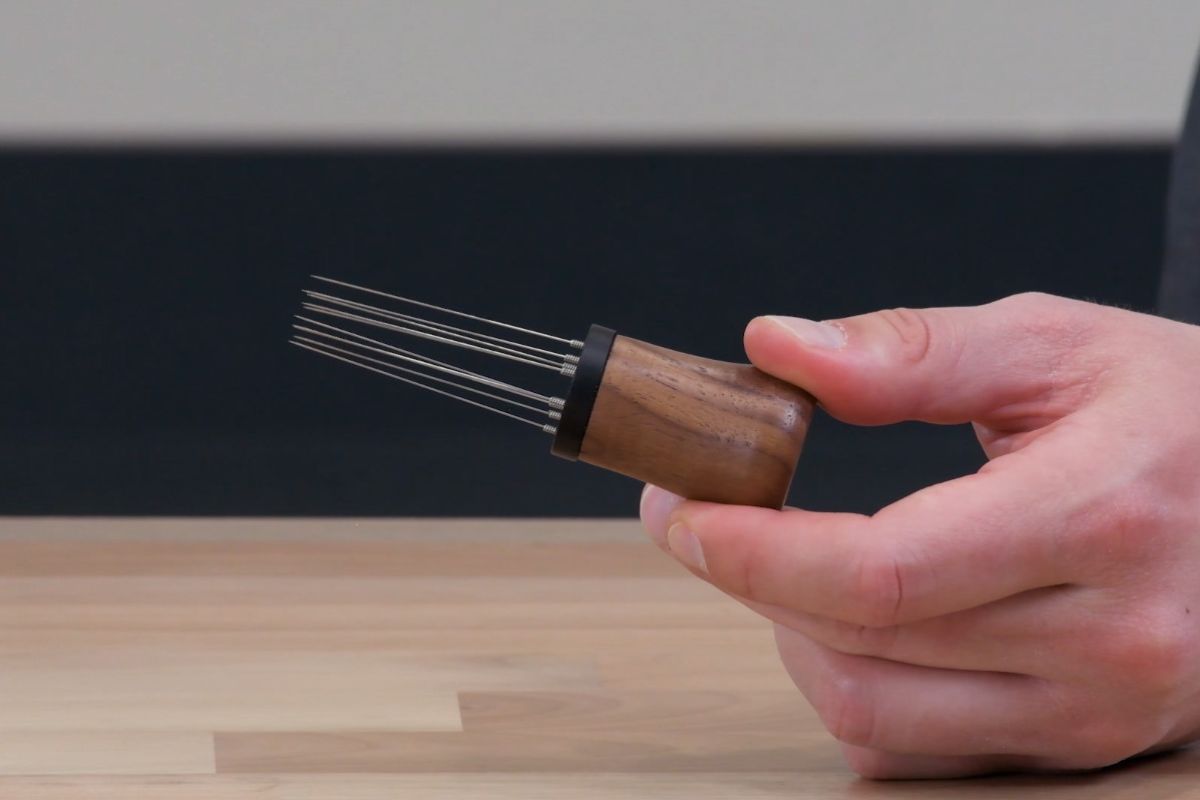
Weiss Distribution Technique (WDT tool) is a secret weapon to help you unlock the full potential of your coffee beans. A WDT is a set of needles to stir the coffee grounds and even them out for proper extraction.
I’ll cover what a WDT tool is, how it works, and my top choices to buy. I’ll even talk about how to make a WDT at home.
What is a WDT Tool?
A WDT tool, fully known as the Weiss Distribution Technique tool, is named after its creator, John Weiss. This tool is used in coffee brewing to distribute coffee grounds in the portafilter evenly.
A WDT tool has a few thin needles that gently stir the coffee grounds in the portafilter before brewing to break up clumps of grounds. The result is more uniform extraction with less channeling. A WDT tool helps you create more consistent, balanced, and flavorful espresso shots.
But why do ground coffee clumps happen? It’s all because of the burrs, especially low-quality ones. Grinding coffee finely creates heat, which means static, which causes grounds to stick together. When you brew espresso, water finds its way around those clumps, leading to channeling.
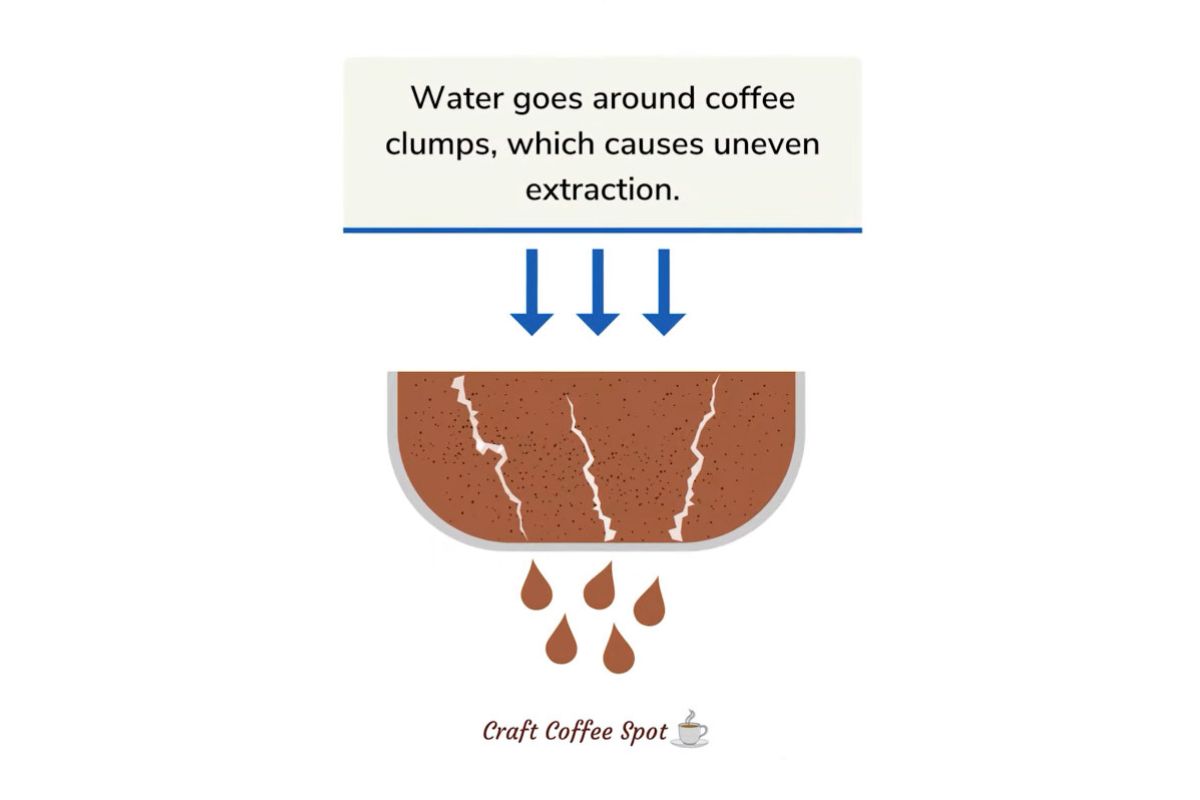
High-quality flat and conical burr grinders have ways of mitigating this problem, but clumping happens even with the best grinders. Even if you grind straight into your basket, the grinds form a mound with more coffee in the middle and less on the sides. If you tamp these grounds, your puck may look even, but in reality, you’ll have more coffee in the center than on the sides. This will create channeling and uneven extraction.
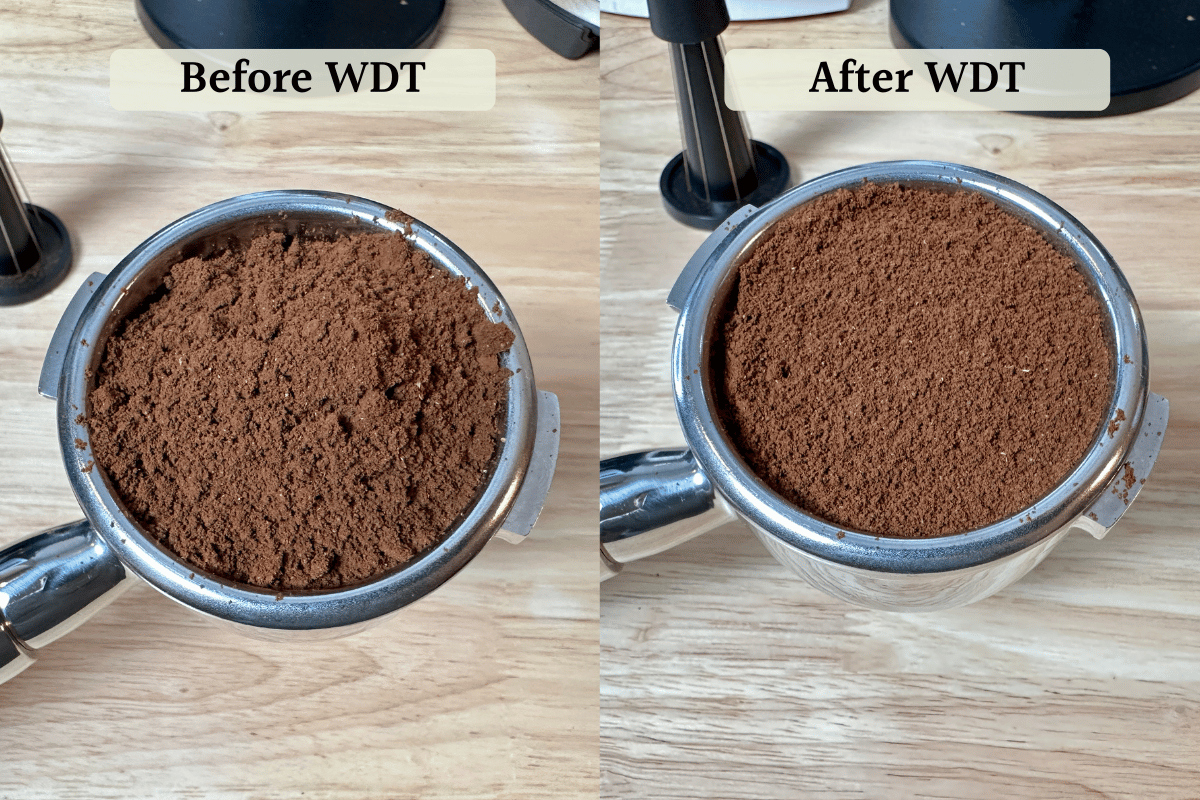
This is where WDT tools come in. The thin needles break clumps apart and redistribute them more evenly in the portafilter.
It’s another step in the workflow, but it doesn’t take much and adds to the ritual of espresso brewing, and the improved espresso quality is worth the extra step.
Who is the Weiss Behind the WDT?
John Weiss is a retired computer science professor, a biochemistry Ph.D., and an espresso enthusiast. He never worked in the coffee industry even though his name is part of one of the most common acronyms in our industry.
Weiss started using bottomless portafilters when they first became popular and noticed the inconsistent pour. He deduced good distribution was important to even extraction, and many grinders at the time produced clumps. This made it difficult to distribute grounds for an even bed. So, he started using a needle to stir the grounds (he also used a yogurt cup with the bottom cut out as a dosing funnel!). The method worked and he shared it on the Home Barista forum in 2005; you can find his original post here.
The Home Barista founder, Dan Kehn, asked Weiss to post a tutorial, and the rest is history. Although initially met with skepticism, the WDT eventually changed the way many home baristas approach puck prep.
Benefits of Using a WDT Tool
These are the benefits of using a WDT tool:
- Better consistency — Even distribution of coffee grounds ensures that water passes through the grounds evenly and doesn’t create channels. This way, you can easily replicate the brew results. In other words, even extraction ensures repeatability in your espresso recipe.
- Improved espresso flavor — WDT tools ensure you extract a full range of flavors from the grounds. You get better clarity, complexity, and coffee depth. Essentially, you’ll notice all the nuances of your beans.
- Less waste — Uneven espresso distribution leads to uneven extraction, which means some grounds haven’t been fully used. WDT tool can evenly distribute the grounds, which reduces waste and maximizes yield.
- Cleaner space — If you tamp without distributing the grounds, you risk getting coffee all over your workspace. WDT tools prevent this, especially if used with a dosing ring and a dosing cup.
- Easy to use — WDT tools are user-friendly, no matter if you’re an amateur or a professional barista.
How to Use a WDT Tool
Using a WDT tool is a simple process that can improve your coffee brewing. Here’s how to do it step-by-step:
- Prepare the portafilter — Grind the beans to the desired fineness and dose into the portafilter basket. Distribute the grounds loosely and level them off.
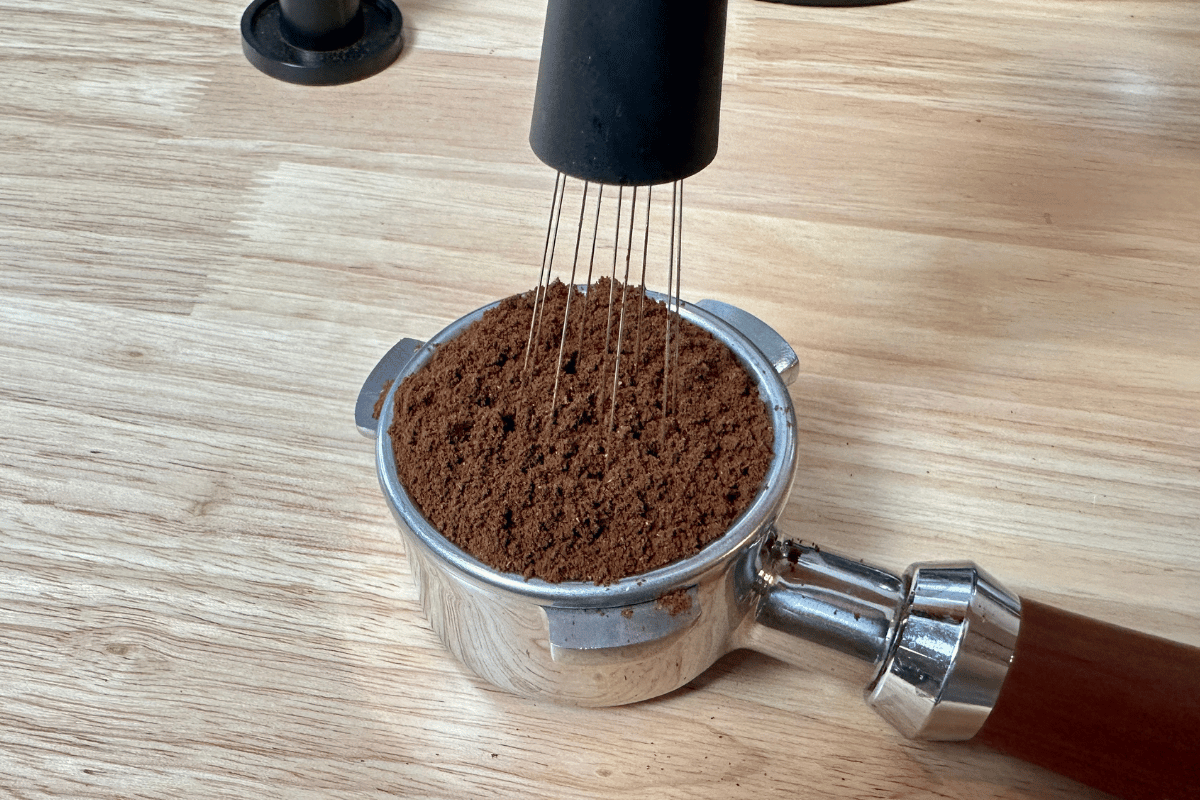
- Use the WDT tool — Gently insert the WDT into the coffee bed.
- Stir — Stir the grounds with the WDT tool in place. Use a gentle circular motion to break the clumps.
- Remove the WDT — Once you’ve stirred the grounds, remove the WDT from the portafilter, making sure not to disturb the coffee bed. Lightly knock the portafilter on the counter to pack the grounds vertically.
- Tamp and brew — Tamp the coffee bed, and brew your espresso.
Pro tip: Use a dosing funnel or a ring to ensure the grounds stay inside the basket. This way, you can use WDT as vigorously as you want without creating a mess.
The above is a general method of using a WDT tool. Technically, there are two ways of using a WDT:
- Deep WDT — You place the needles to the bottom of the portafilter basket and stir in overlapping circles. This is especially helpful with poor grinders that produce a lot of clumping.
- Shallow WDT, or Puck Raking — You scrape the top level of the grounds to even them out. This is less about declumping, and more about distributing the initial mound of coffee grounds more evenly in the portafilter.
These methods were even studied, and it was concluded that the deep WDT is more effective compared to the other two methods. Shallow WDT is still effective at distributing grounds evenly if your grinder already does a good job of preventing clumping.
What To Look For In A WDT
There are several things you want in a WDT:
- Material: stainless steel and food grade
- Thickness: choose .4mm or .35mm
- Spacing: don’t put the needles too close, or it’ll catch the coffee in between. A quarter inch or 5 millimeters of space between needles is good.
- Density: 4-5 needles is enough
The most important aspects of a WDT tool are needle material and thickness. The best WDT tool needles are made of stainless steel. Stainless steel is a good choice because it’s flexible, strong, and easy to clean. Flexible needles are especially important for the deep WDT technique, as they create enough force to break up clumps without creating dense areas in the puck as you stir.
You also need thin needles for the best puck prep. The most common needle diameter is 0.4 mm. I also suggest trying .35 mm, which works better for me.
You don’t want needles that are too thin, as these will bend quite easily. Conversely, if your needles are too thick, the tool will create channels instead of breaking clumps. I recommend a WDT that is thin and also has relatively short needles so they don’t bend.
Best WDT Tools
Nowadays, you can find WDT tools with ergonomic designs, so they are easy to use. Plus, they are aesthetically appealing.

In all honesty, you don’t necessarily need to pay a lot for design and ergonomics. You can even make your own tool using a few acupuncture needles. Here are a few of my favorites, chosen based on value.
1. MiiCoffee WDT Espresso Distribution Tool
The MiiCoffee WDT has nine 0.4 mm needles in a hexagonal shape. The needles are made of stainless steel material. They don’t have a sharp tip, so you don’t have to worry they’ll hurt your fingers. Plus, they won’t scratch the bottom of the portafilter.
The tool comes with a simple stand where you put the needles face down. there are also multiple magnetic points, so you can stick your WDT on the side of the espresso machine. Finally, it comes with nine extra needles.
The best part: it’s the least expensive WDT on this list. Also, I used the extra needles to make a DIY WDT, so it’s a two-for-one!
2. FusedLine WDT Tool and Self-Aligning Stand
The FusedLine WDT tool has an attractive design thanks to the curved handle. The pins holder is 3D printed and made of plastic. The pins are 0.4 mm in diameter and made of stainless steel, which allows for a good combination of flexibility and rigidity.
This tool comes with a self-aligning stand with a weighted bottom and catch tray. You can easily store the tool between uses and keep your space tidy.
3. MORILS WDT Espresso Tool
Unlike the previous two, the Morils WDT tool has ten 0.35mm stainless steel needles, which is the diameter I actually prefer. In my experience, these needles do a better job of distributing the coffee grounds in the portafilter.
This tool also stands out because of its design. It has a walnut handle and wood stand with an attractive wooden grain. Overall it looks good, but it’s easy to get a needle caught and bent when trying to fit the tool into its protective base.
How To Make A Homemade WDT
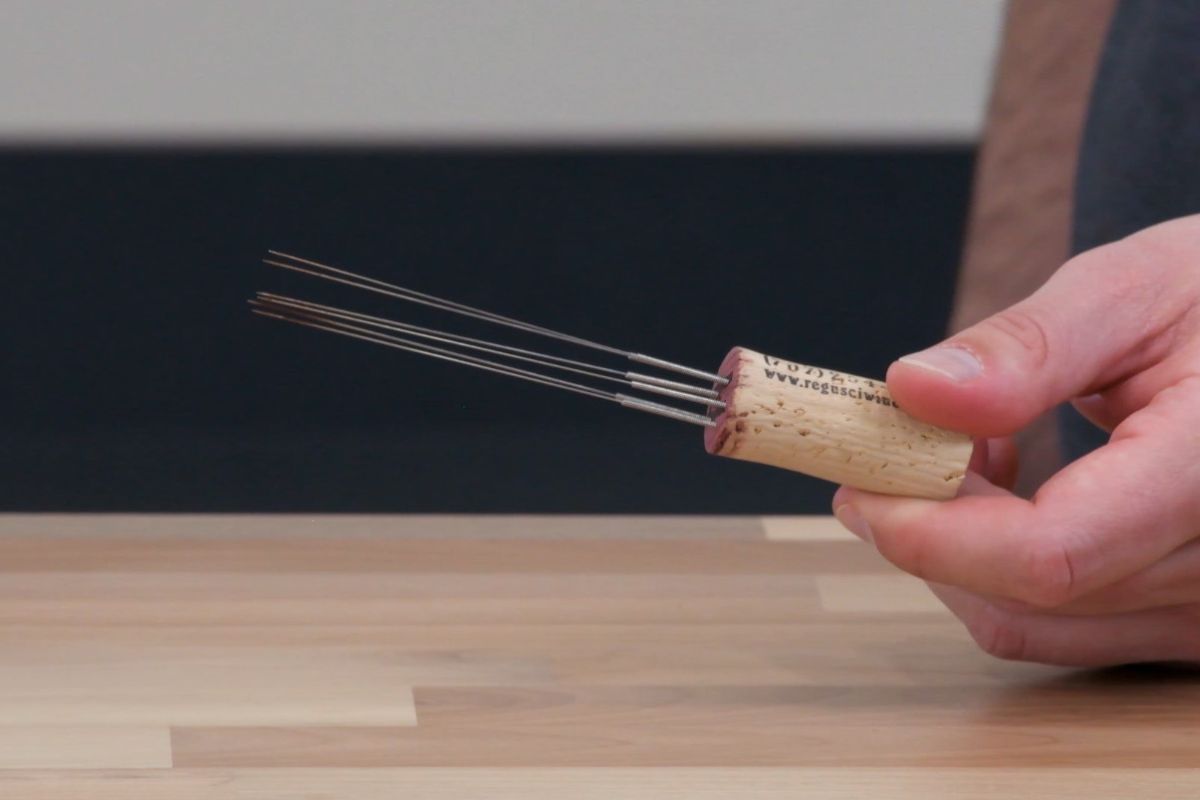
The original needle Weiss used was a dissecting needle, and people have used many versions since then.
To make your own WDT tool, I recommend using 3-9 needles of 0.4 or 0.35 mm in diameter and a cork as the base. I used these printer nozzle cleaning tools for my homemade WDT.
Make sure the needles are spaced evenly apart. Spacing is important because you don’t want the needles too close, since coffee may clump between them, or too far since they won’t distribute the grounds evenly.
Once done, test your homemade WDT tool by gently stirring the grounds in the portafilter. If needed, you can adjust the needle’s length or position.
Warning: don’t use a paperclip for a WDT. Many DIY kits recommend this, but the paperclip is too thick. Instead, use a paper clip to create the holes in the cork.
Do You Need a WDT Tool?
Yes! You need a WDT tool. This device is a game-changer for espresso enthusiasts who want optimal extraction. It solves uneven distribution, minimizes channeling, and promotes uniform extraction. You’ll have a well-balanced and flavorful espresso cup. You can buy a WDT tool or spend about 10 minutes making your own.
WDT tool changed my espresso brewing process, but this isn’t the only accessory I swear by. Check out my round-up of the best accessories for the best Breville espresso machine for the best espresso results.