So you got a Breville espresso machine. Congrats, and welcome to the world of espresso! Soon, you’ll be tempted by all those beautiful accessories on social media. Do you actually need them?
There’s a wide range of accessories for a Breville espresso machine — portafilters, tamper, distributor, WDT, scale, and I’ve tested many combinations:
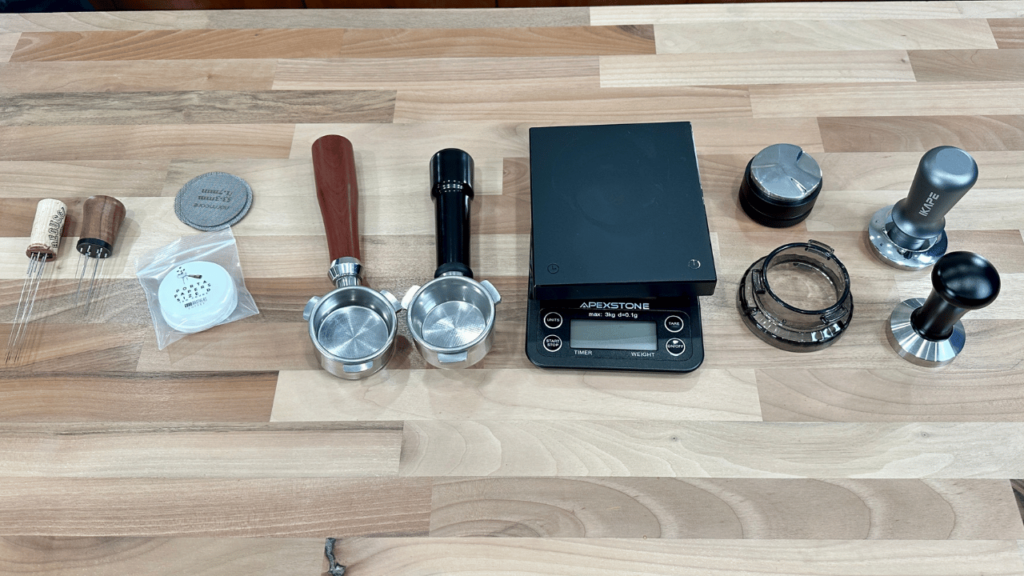
To me, there are two accessories that you need: a WDT and a scale. You obviously need a tamper and portafilter, but those come with the machine. Other tools can help, and my favorite products are here on Amazon.
Today I’ll go over every kind of accessory you can use with your Breville espresso machines and explain their impact on espresso, workflow, and cost.
Accessories for Breville Espresso Machine
Before you purchase an accessory, there are three things to consider:
- Espresso impact: how much does the tool improve your espresso? Simple and most important.
- Workflow: how much time does it add to your process? Most accessories that improve your espresso add another step, while some things make it easier or cleaner.
- Cost: how much does it cost? Low is $20 or less, medium is up to $50, and you can spend more depending on the tool or brand. The list focuses on the value options.
All the tools below are graded on these three factors, with the most important being ones with a high impact on espresso without making your life difficult and expensive.
You can see my full thoughts on our video:
Lastly, the opinions apply to any espresso machine, although this list was written for Breville machines.
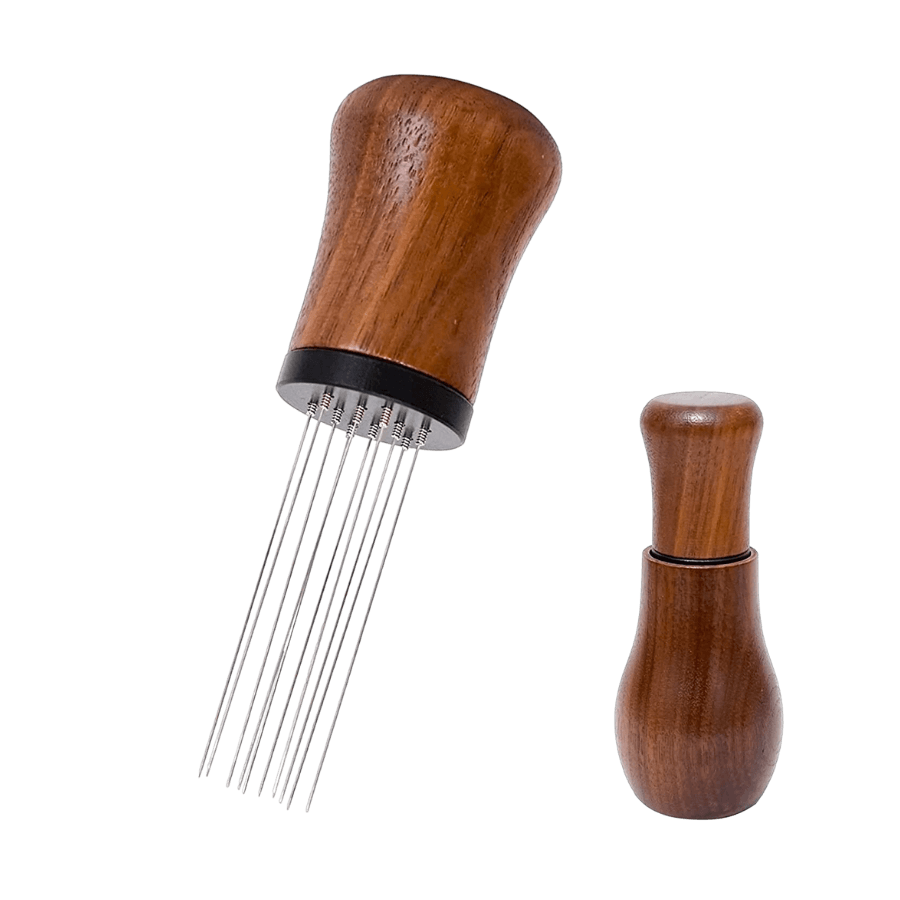
1. WDT Tool
WDT Tool highlights:
- Espresso Impact: Big improvement
- Workflow Change: Extra 10 seconds of zen
- Cost: Minimal
I’ll start with a tool I find indispensable — the WDT. WDT is a simple but highly effective tool used to make sure you have consistent and even distribution of coffee grounds in the portafilter before tamping. It’s useful for any espresso machine, but especially Brevilles.
The full name is Weiss Distribution Technique (WDT), based on the creator John Weiss. He realized coffee clumps when coming out of the grinder, and thin needles can break up these clumps.
WDT has a huge impact on espresso. The Breville grinders (particularly on the Barista line) create a lot of clumps, and water will channel around those clumps, leading some coffee to get over-extracted while other parts are under-extracted. This is the biggest reason for sour or bitter shots. The WDT breaks up the clumps for a level coffee bed, so you have uniform extraction and a better-tasting espresso.
As far as workflow, it takes some time and can be messy. You need to stir the grounds fully to get the full effects of WDT. That said, it’s become 10 seconds of zen in my morning, and you can make it easier with a dosing funnel (more on that later).
In terms of cost, a WDT is extremely affordable, especially when considering the value it provides and its impact on espresso quality. You can get a WDT on Amazon or make one yourself.
I made a WDT with a wine cork and acupuncture needles, which took 10 minutes and does a perfect job. Make sure to use needles that are .4 mm in diameter or less.
2. Coffee Scale
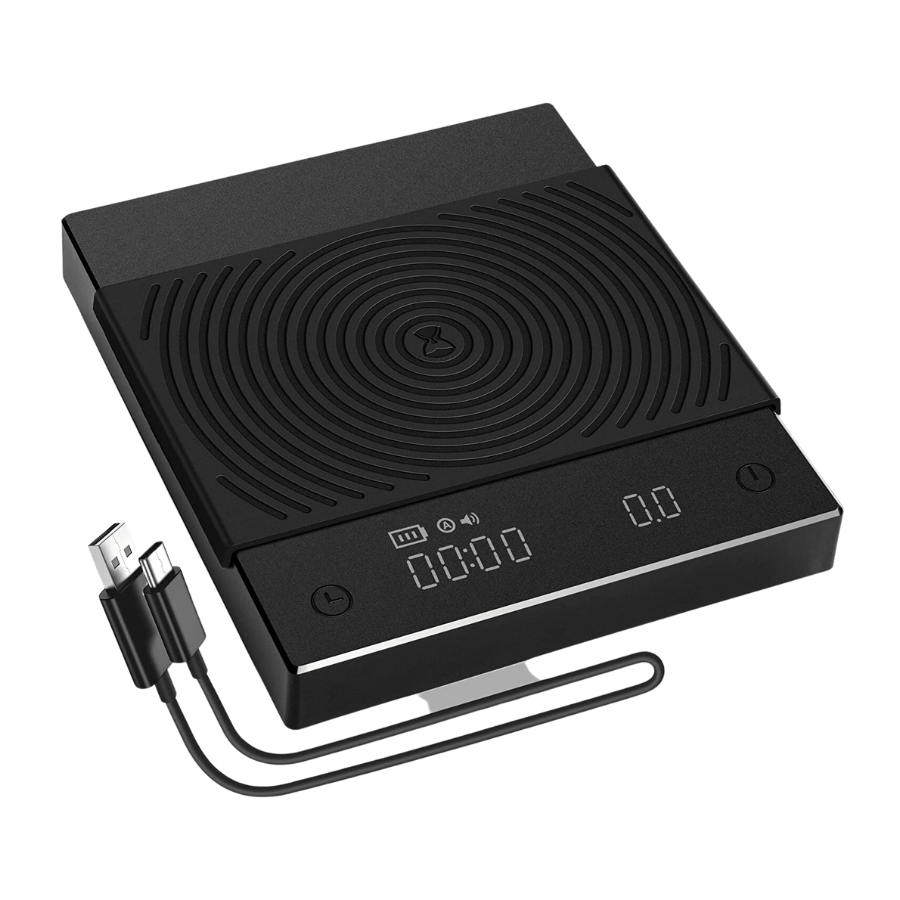
Coffee Scale highlights:
- Espresso Impact: High
- Workflow Change: Minimal
- Cost: Varies
A coffee scale is another crucial accessory for espresso lovers who seek precision and consistency in the brewing process. The scale accurately measures the weight of coffee beans in and the amount of espresso out, so you have the necessary information for the perfect brew.
You might think the timed grind and volumetric dosing on Brevilles are enough, but that’s not true. Your dose will depend on the grind size, as a 15-second dose will give you less coffee on a fine grind and more with a coarse grind. You need to measure your coffee in and espresso out based on weight, not time. Hence, the need for a scale.
Precise measurements are important for espresso because even slight variations in dose can impact the extraction and taste. Overall, a coffee scale eliminates guesswork and helps you have a perfect coffee-to-water ratio, so you have a balanced shot every time.
A coffee scale won’t slow you down either, as it streamlines the espresso brewing process. There’s less need for trial and error and fewer wasted beans.
In terms of cost and quality, there are huge variations. You can find a coffee scale for as little as $20 or for $200+. Basic digital scales can provide accurate readings, but you can also choose advanced ones with built-in timers, Bluetooth connectivity, and other features for a higher price.
We’ve done a full review on coffee scales, and my advice is to go for an accurate basic scale (look for an accuracy of 0.1 g) with a timer. You don’t need a high-tech coffee scale, as anything will help.
3. Bottomless Portafilter

Bottomless Portafilter highlights:
- Espresso Impact: None
- Workflow Change: Easier clean up
- Cost: Medium
This portafilter doesn’t have a spouted bottom covering the basket, thus the name. Unlike the first two accessories, a bottomless or a naked portafilter doesn’t have as much impact on espresso.
There’s an argument that a bottomless portafilter does improve espresso, as it allows you to see the espresso flow. An uneven flow signals channeling issues, so the logic goes.
However, I don’t think it’s that simple. Espresso flows too fast to notice imperfections, and grind size can easily affect the “look” of the flow. I doubt a bottomless portafilter will notably improve your espresso. Besides, taste is the best way to diagnose issues.
For me, the big advantage of bottomless portafilters is cleanliness and ease of use. Coffee and water build up inside a spouted portafilter, and the Breville 54 mm portafilters have plastic inside, which really attracts water. You need to pull out the basket to dry out that water and old coffee, or else it’ll come into your next shot!
Meanwhile, a naked portafilter is much easier to clean. There’s no bottom that collects water, and you can rinse it under a sink or run a blank shot. Plus, you have more cup clearance and can use a larger mug with bottomless portafilters.
The cost is medium. Bottomless portafilters tend to be slightly more expensive than standard ones, and I included the most cost-effective options on my list.
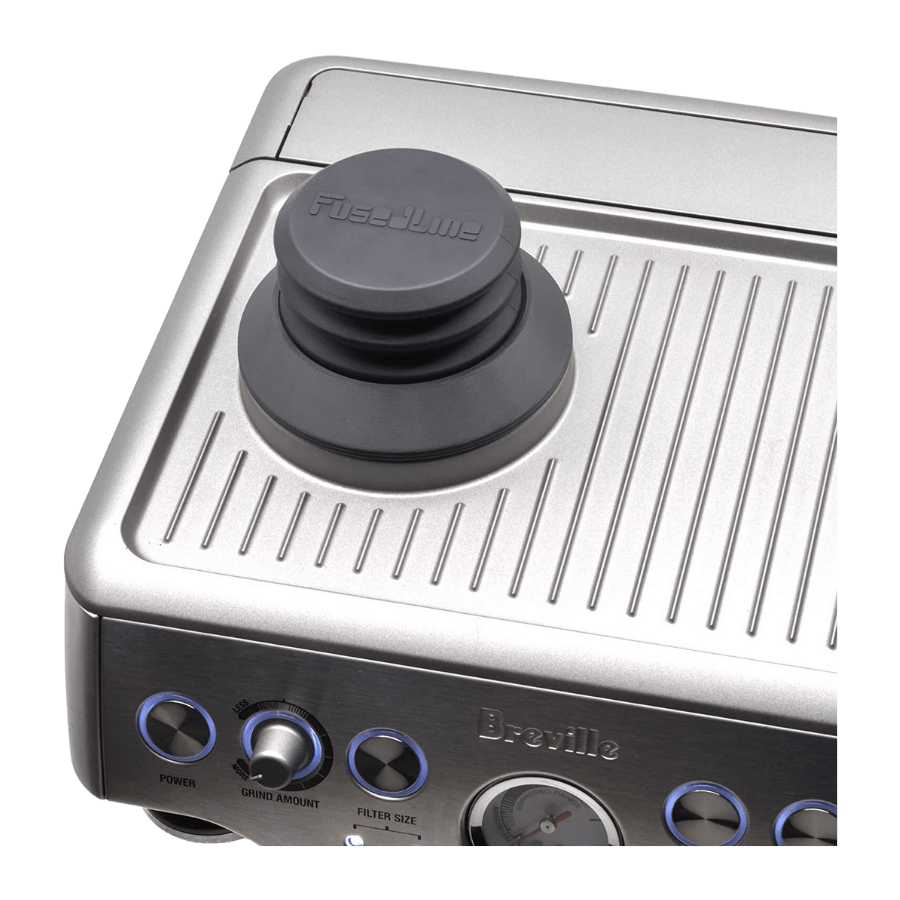
4. Tamper
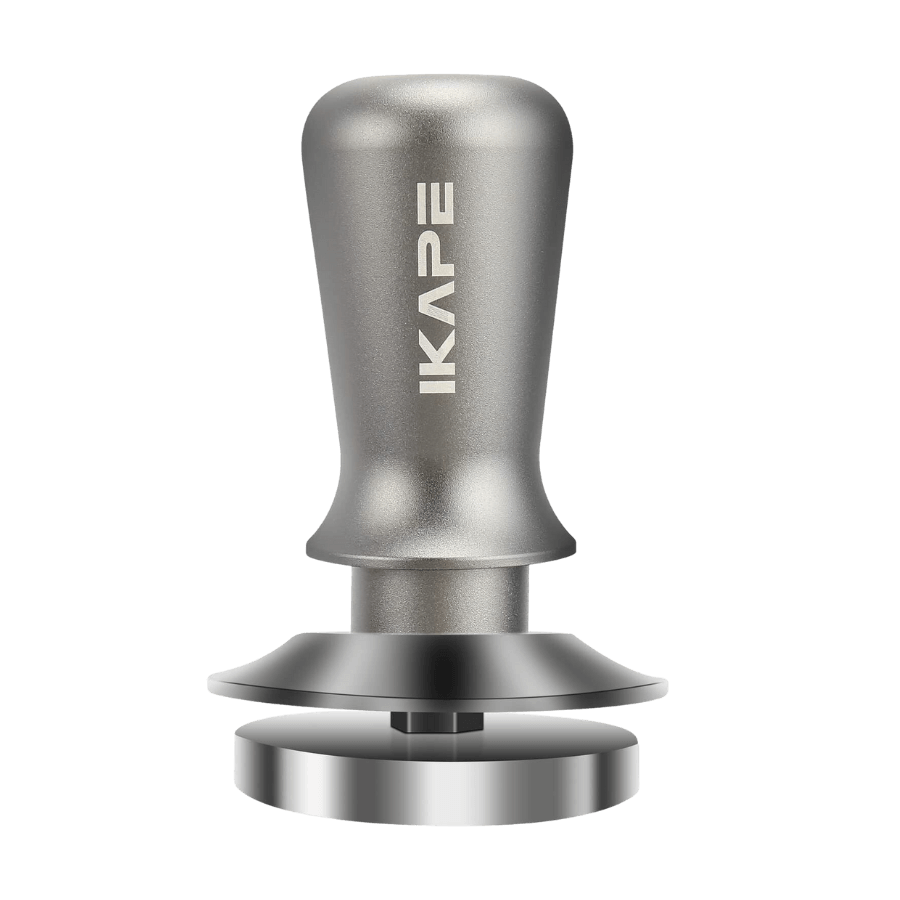
Tamper highlights:
- Espresso Impact: Medium benefit
- Workflow Change: Saves time
- Cost: Medium
Tamper brings us back to consistency and how being consistent is crucial during the espresso brewing process. Breville machines come with tampers, but these aren’t the greatest, especially for beginner baristas, so you may consider investing in a new one.
Overall, a tamper isn’t as crucial as a coffee scale or a WDT, but it’s a helpful tool. The key is making a level tamp, not a forceful one. An unlevel tamp will cause channeling because water will flow unevenly across the whole puck bed. As for force, you don’t need to press down that hard to make a good tamp; just so you get good resistance.
You should choose a tamper that fills the portafilter precisely to the edges and is easy to use. A well-designed tamper helps you have a consistent tamping technique and better repeatability in espresso shots. This means less wasted time on adjustments and experiments and a more streamlined process.
You can get a nice, ergonomic tamper at an affordable price like the Luxhaus tamper I recommend.
For an upgrade, a self-leveling tamper will be a big help. This has an outer ring that sticks to the edge of the portafilter, which ensures the puck it’s always level. This one from Ikape is a really nice upgrade that saves a lot of time and ensures perfect repeatability. Plus, there’s a spring, so you can know exactly when it gets to the bottom of the puck.
5. Distributor
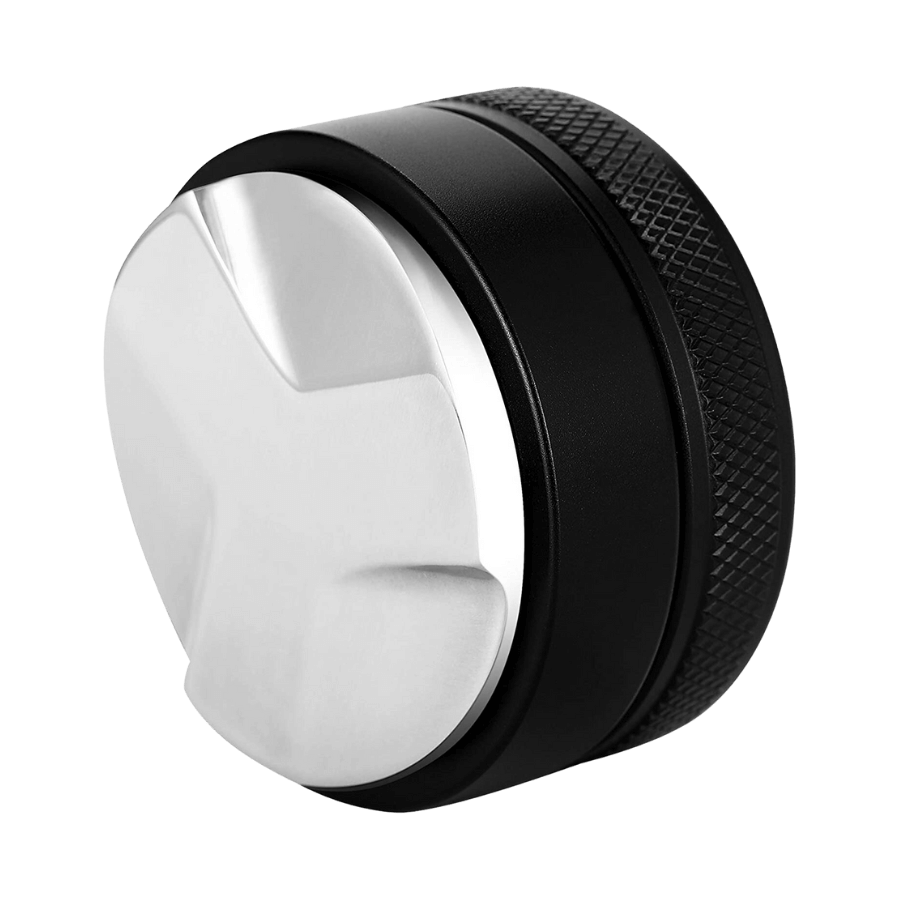
Distributor highlights:
- Espresso Impact: Minimal benefit
- Workflow Change: Another step…
- Cost: medium/high
If you want an extra level of puck prep, try a distributor. You lay a coffee distributor flat on top of the portafilter and spin it a few times to distribute the grounds. It helps you have an even distribution of coffee grounds in the portafilter, which results in optimal extraction and flavor.
It aims to eliminate unevenness and inconsistencies in the grounds before you tamp.
However, I found a WDT tool, good hand distribution, and a good tamper are enough. For me, the coffee distributor was another step in the espresso workflow. However, many people love distributors, so you may consider it.
The distributor cost varies depending on the brand, material, and design, but you can find some affordable models, like the Apexstone. Some double as a tamper, which may be more worthwhile.
6. Dosing Funnel

Dosing Funnel highlights:
- Espresso Impact: None
- Workflow Change: Reduces mess
- Cost: Low/Medium (or ask Breville)
Raise your hand if you’ve spilled ground coffee when removing the portafilter and trying to distribute the grounds with your palm or a WDT.
If not, you’re lying. This is where the dosing funnel comes in.
The dosing funnel fits securely onto the top of the portafilter, as add an extra wall around the edges. The grounds go directly into the filter basket, and you can’t make a mess.
I admit a dosing funnel makes the workflow easier. However, I don’t use it. I found I can shake the portafilter while the Breville grinder is running, which levels the grounds enough.
I give an advantage to the dosing funnel because the funnel lets you use WDT as vigorously as you like without worrying coffee will spill from the portafilter.
Overall, a dosing funnel reduces the need for cleanup, and you have less coffee waste. However, I found a way around it, so for me, it’s not necessary.
Note 1: You can also use a dosing cup. You dose into the cup and then transfer the grounds from the cup to the portafilter. Again, I’m not a fan because it’s an extra step. Plus, it often creates a mess when transferring the coffee into the portafilter.
Note 2: Breville has included a dosing funnel in some models (I got one with a Barista Express), so register your model and ask if it should be included.
The cost of a dosing funnel is low, so consider giving it a try.
7. Puck Screen

Puck Screen highlights:
- Espresso Impact: ???
- Workflow Change: ???
- Cost: Low
A puck screen is a metal mesh screen that goes on top of the puck before you place it in the group head. The idea is that the mesh distributes the water more evenly, which means more even extraction and a balanced cup without issues such as channeling.
The puck screen impacts the workflow, especially in terms of cleanliness. This is a layer between the coffee and the shower screen, so it helps keep the group head clean. There’s less need to clean the coffee machine and backflush.
However, you need to clean the puck screen, which requires soaking it in a cleaning solution or a powder. It can take at least an hour to clean the oils that collect in the mesh.
Also, it’s unclear whether a puck screen improves espresso. We found it increased TDS and extraction on a nice La Marzocco, but I never repeated this with my Breville at home. Maybe it’s the high pressure that outweighs the impact of espresso, or the beans, or the grinder. Opinions are split on puck screens…
Luckily, the cost is low, so it’s easy to give it a try and see how it works for you.
8. Paper Filter
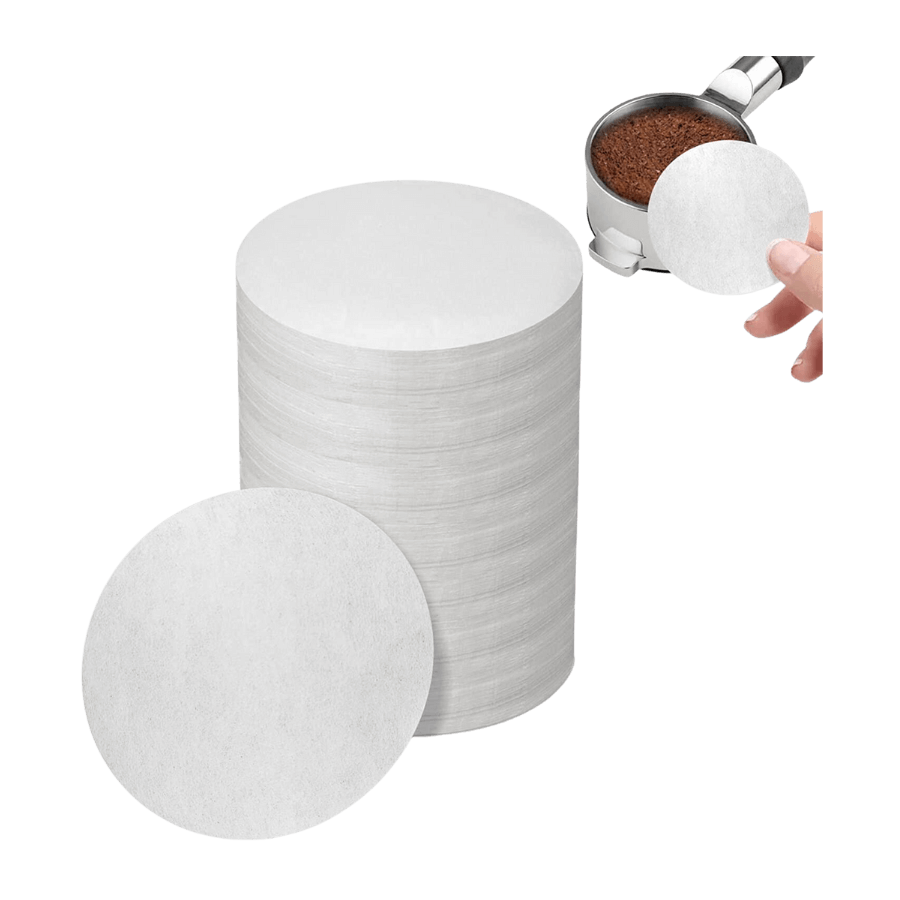
Paper Filter highlights:
- Espresso Impact: Cleaner and sweeter
- Workflow Change: Quick addition
- Cost: Low
You place a paper filter on the bottom of the portafilter before dosing the coffee. There are a few reasons I like it. Firstly, it strains out heavy, bitter compounds, so you get a sweeter espresso. You also have a cleaner shot, meaning there’s less spraying, especially when you use a bottomless portafilter.
Finally, a paper filter increases the flow rate. Without a paper filter, I get 1.5 to 2.5 g per second, but with a paper filter, I get 3-5 g, which is a significant difference. This means you can grind finer, which increases TDS and extraction yield, and (theoretically) improves the flavor profile.
Overall, a paper filter is a quick addition to the workflow that can make a big difference, and I prefer it to the puck screen. Plus, you can just dump it in the trash when you’re brewing espresso. As for the cost, it’s minimal, so there’s no reason not to try this espresso machine accessory.
9. Breville Knock Box
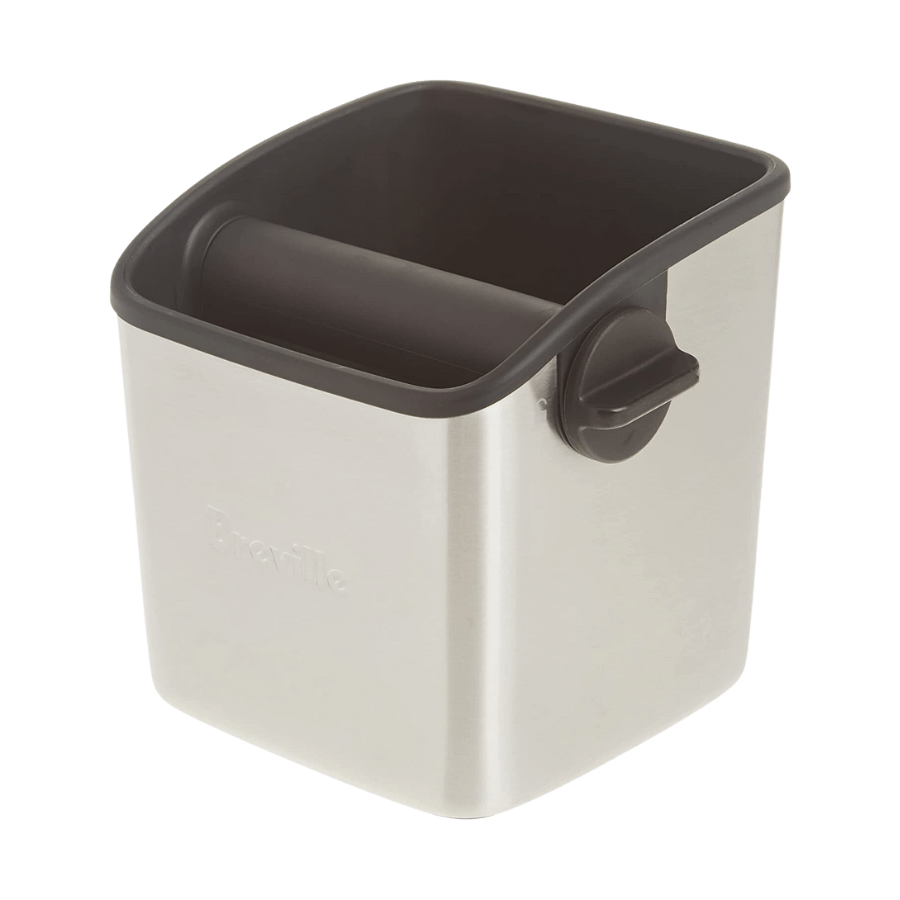
Breville Knock Box highlights:
- Espresso Impact: None
- Workflow Change: Helpful for clean up
- Cost: low for mini knock box
Brewing espresso can be a very messy business. Apart from the coffee ground mess, you need to dispose of used coffee pucks properly. This can be an issue if your Breville espresso machines aren’t located near a sink or a trash can (and who wants to keep their espresso machine near the trash?).
Breville Knock Box is a designated place to dispose of used coffee pucks. You can choose between Mini Knock Box with 0.5 l capacity and a larger one with 1.8 l capacity depending on how much counter space you have.
The Knock Box has a non-slip base, and it’s made of stainless steel, so you can knock the portafilter against it to remove the puck. There’s a removable inner bowl, so it’s easy to empty it. Plus, you can wash it in the dishwasher.
I like the knock box, and the mini version is inexpensive and takes up limited space. Even though my trash is close, the knock box makes it a lot simpler. The Breville mini version holds six pucks, which is enough to make life easier.
The price is low, depending on which size you go for. Overall, this is a handy tool for disposing of coffee grounds after extraction, but I don’t think it’s absolutely necessary.
10. Single-Dose Hopper
Single-Dose Hopper highlights:
- Espresso Impact: low to medium
- Workflow Change: takes time to install
- Cost: high
A single-dose hopper is a serious upgrade accessory for a Breville machine. The idea is to minimize the grind retention in your Breville grinder. These grinders retrain a lot – up to 2 grams – in the hopper, even when single dosing. The single-dose hopper is smaller, so you can overload old beans. It also has a bellow to push air through the burrs to force out those old grounds. Overall, you get a fresher shot.
A single-dose hopper can certainly improve your espresso. Fresher beans will make a difference. Moreover, a single-dose hopper lets you easily switch between different coffee beans without needing to empty out a large hopper.
The downside is the installation is not simple, and frankly, this is the one Breville accessory that I have not tried. You need to remove your hopper, and the Breville espresso machine won’t operate unless the hopper is precisely installed.
The price is medium to high, and I don’t think it’s a must-have accessory, but it can be a good investment if you want to experiment and prioritize bean freshness.
Cleaning Accessories
These are more mandatory items to remember as you use your espresso machine.
We’ve discussed cleaning and descaling and backflushing as well, so you can take care of your machine.
1. Espresso Cleaning Tablets
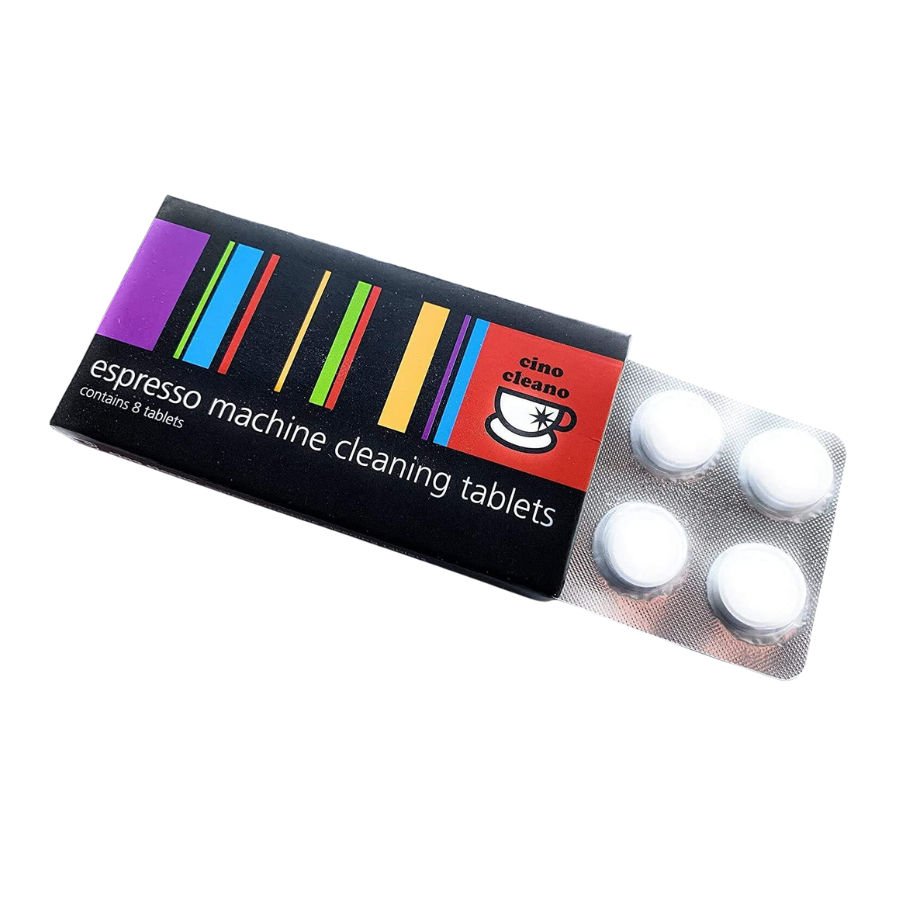
Espresso Cleaning Tablets highlights:
Cleaning tablets help you keep your Breville machine in optimal condition. They remove coffee oils, residue, and mineral deposits that accumulate in the coffee machine over time and negatively affect the taste of your espresso.
You need to use the cleaning tablets for the brew group, portafilter, and water lines. You also use them to descale the machine as needed. You dissolve them in water, and this solution is run through the espresso machine by running a cleaning cycle or backflushing.
Overall, you need cleaning tablets to keep your machine running smoothly. However, Breville tablets are on the more expensive side, and I successfully cleaned espresso machines with tablets half the price.
2. Water Filter
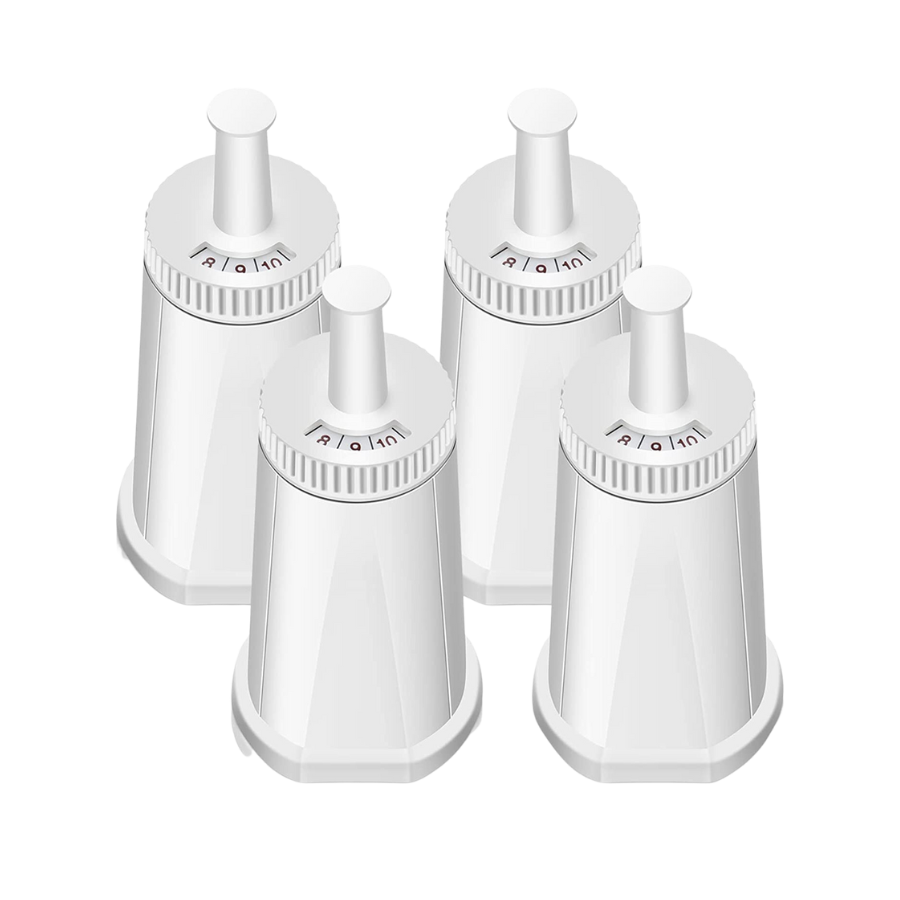
Water Filter highlights:
A water filter improves the water quality. It removes impurities in water, so you have a better aroma and espresso taste. Most Breville machines, such as Barista Express and Barista Touch, have water filtration systems.
A water filter doesn’t have much impact on your workflow. You insert it once, and there’s no need to touch it again until it’s time to replace it, which is usually around 90 days.
The cost is low to medium, depending on where you buy your Breville water filter.
What’s the Best Accessory for Your Breville Espresso Machine
You don’t really need any accessories. When you buy a Breville machine, you’ll get everything you need in the box, and you can get by. But some accessories help you raise your espresso game to the next level. You can see the full list of accessories here.
My advice is to invest in an accurate scale and a WDT tool. A self-leveling tamper and a bottomless portafilter can also help but aren’t really necessary. The rest is up to you. Decide what works best for your needs and budget.
Another accessory that we didn’t mention is the grinder. In case your Breville machine doesn’t have a built-in grinder, or you want something better than what Breville offers, check out our round-up of the best grinders for espresso.