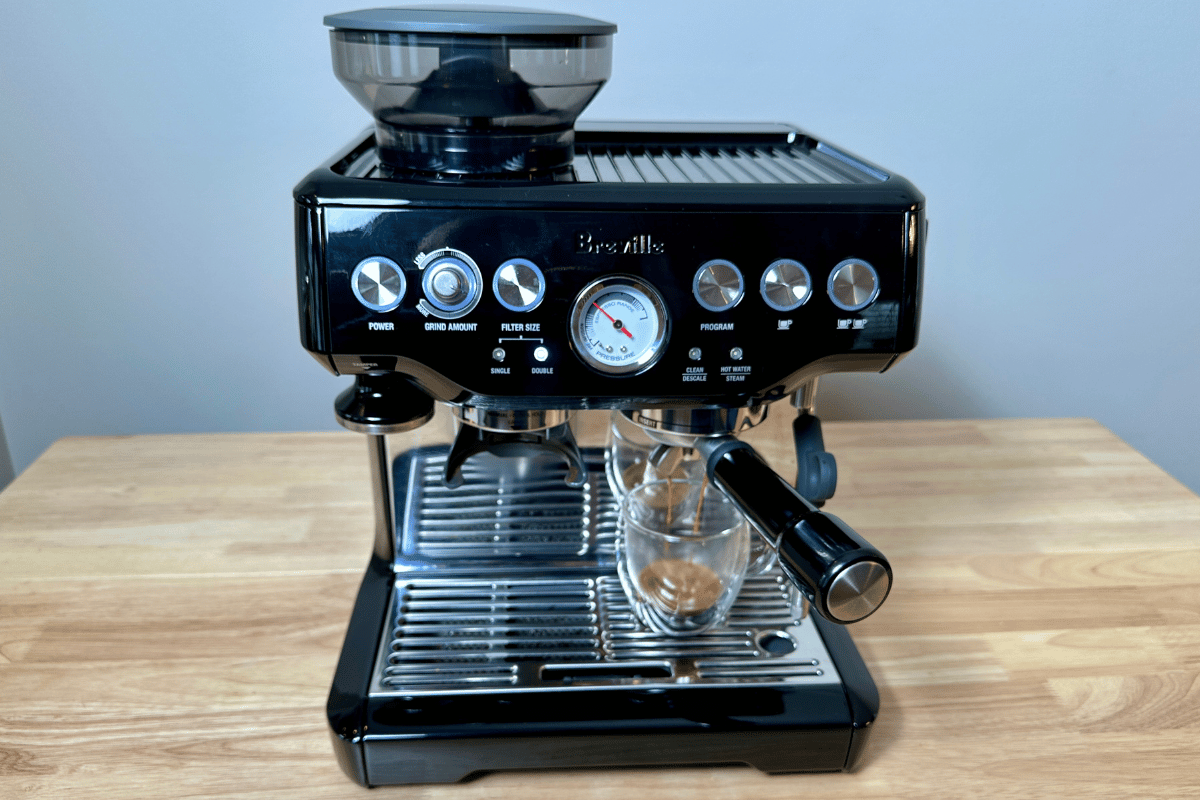
The Breville Barista Express runs at a much higher pressure than newer models. It’s often at 14-15 bars, which is well above the standard 9 bars of pressure for espresso.
You can reduce the pressure by adjusting the over-pressure valve (OPV) inside the machine. The OPV regulates the pressure, and by opening your Barista Express and unscrewing the OPV a little, you reduce the pressure for a smoother espresso. The bonus is the machine becomes more forgiving, too.
I’ll go through the Breville Barista Express OPV Mod. It takes 30 minutes, and you’ll need a Phillips screwdriver, a small flathead, and a zip tie.
Disclaimer: opening your machine will void the warranty. This guide is just for learning only.
How To Open The Breville Barista Express
The first part is to open the Breville espresso machine. Before you begin, make sure it’s unplugged and is completely cool.
First, you’ll want to remove all detachable parts from the machine. This includes the bean hopper, tamper, water tank, drip tray, and even that nifty hidden compartment behind the drip tray.
Now, let’s tackle the screws. The machine has a total of 12 screws that you’ll need to unscrew.
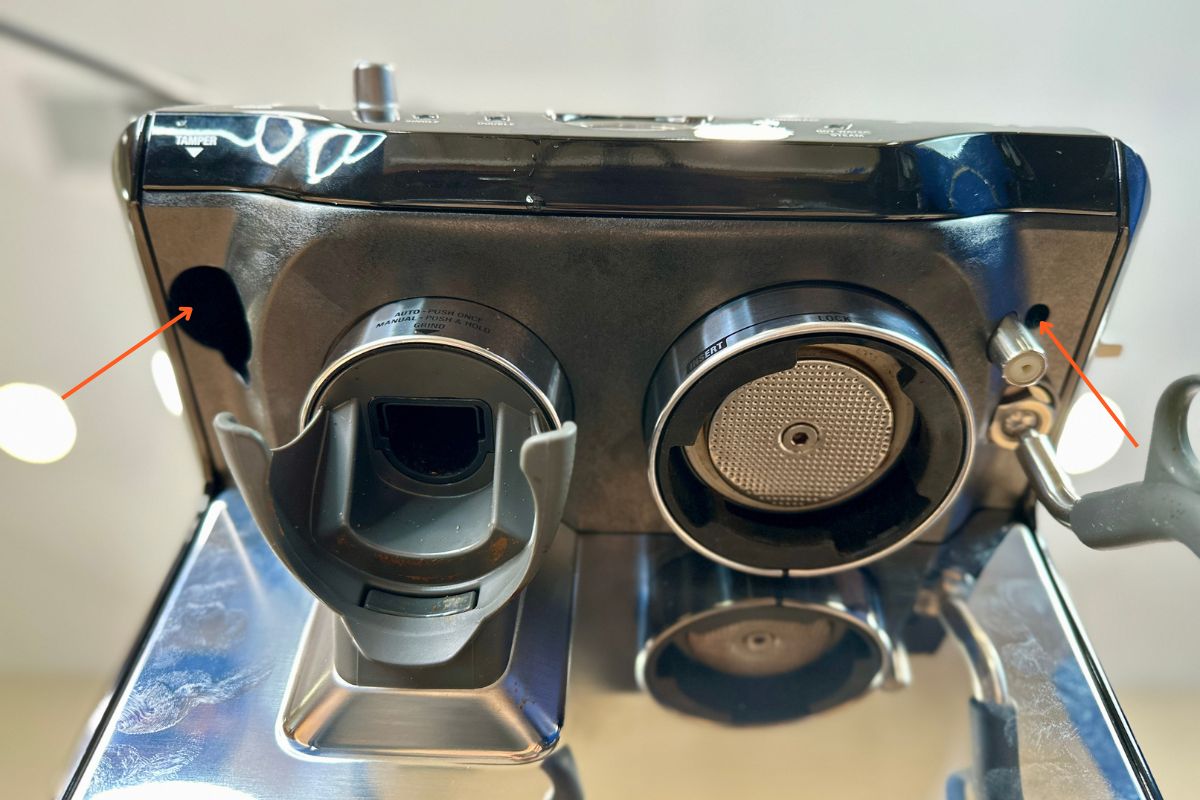
On the front, you’ll find two screws around the brew head: one is situated near the hot water spout, and another right next to the tamper.
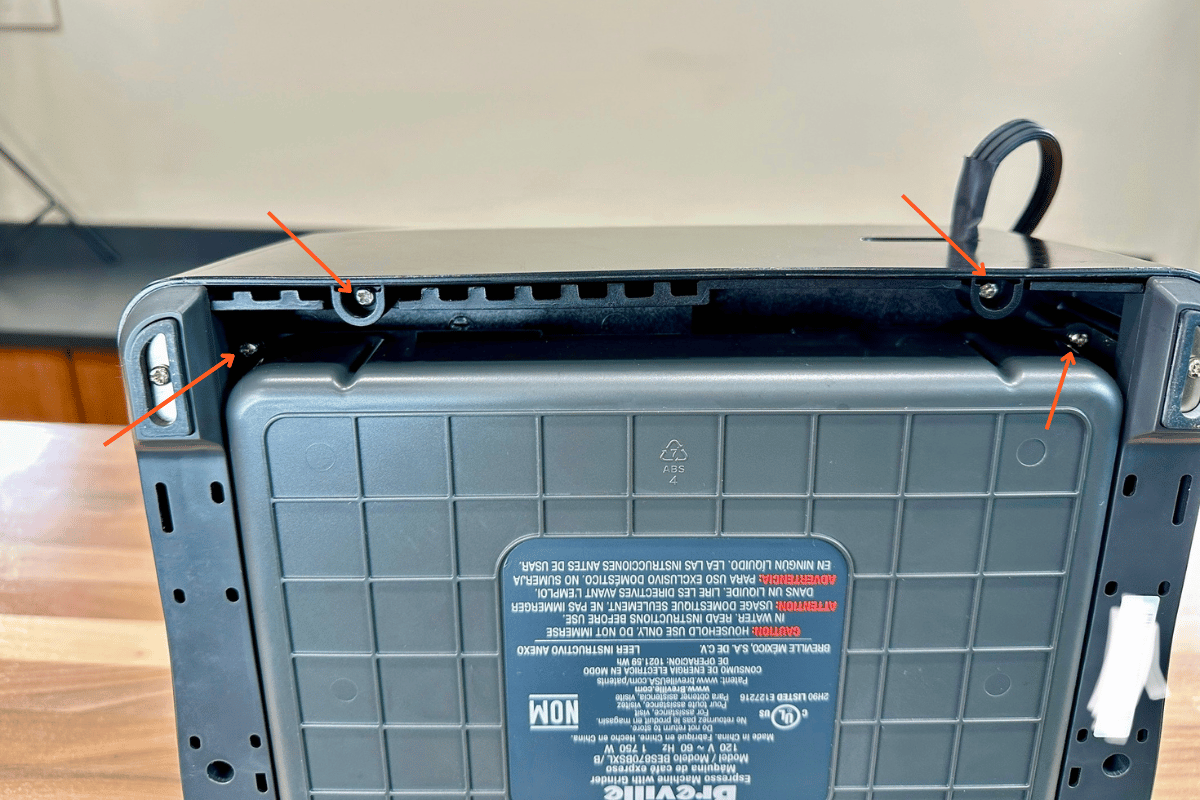
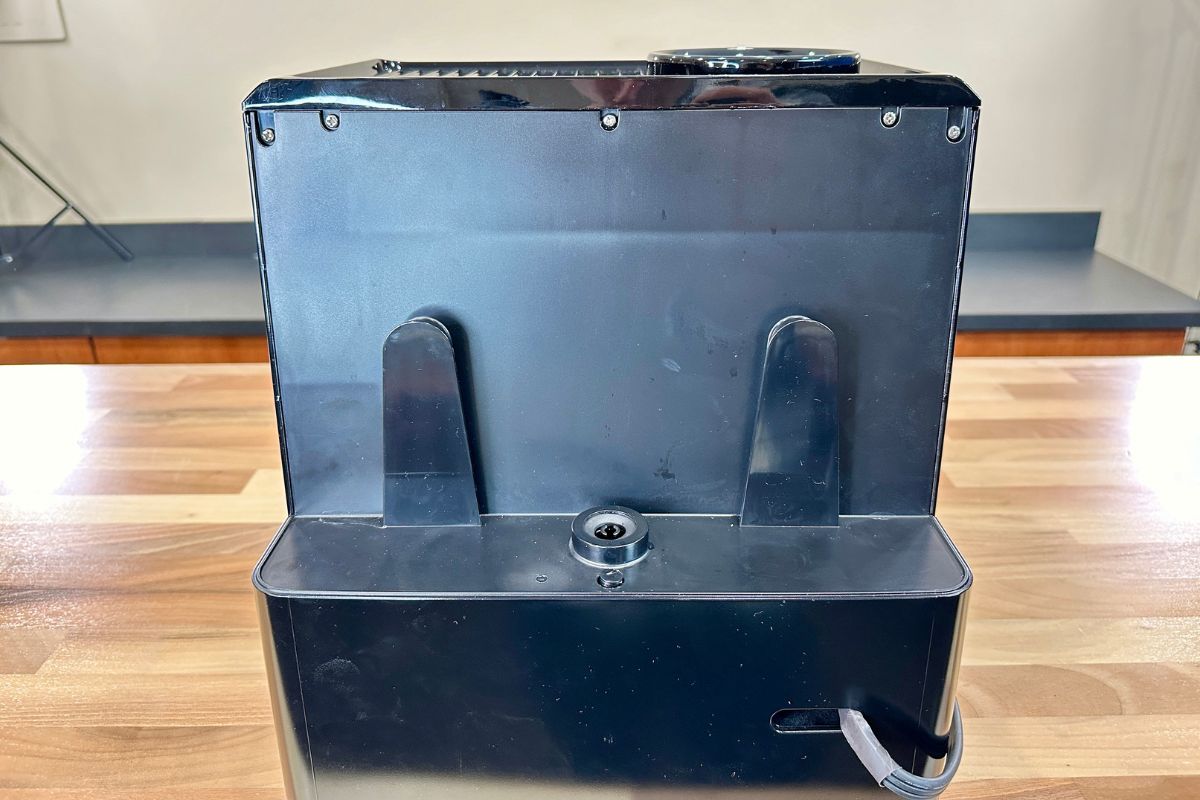
Turning the machine around, the back bottom has four screws. Two are in plain sight along the bottom edge, while the other two are hidden just under the inside.
Lastly, on the back panel, there are six screws to deal with. Five of these are conveniently located on top, but there’s one at the base that’s a tad tricky. This last one is covered by a cap, which can be challenging to remove. I had to use a small flathead screwdriver and a knife to pry it off. If you have a sewing needle or any some hook tool, those could come in handy.
The last screw is also deep in the machine. A nice magnetic screwdriver will work wonders here. I had to tip the machine on the side to remove this stubborn screw.
Once the screws are out, you can proceed to remove the panels. The top panel comes off easily. Just lift it up and unclip the wire for the hopper sensor.
The back panel is fastened with tight clips on its sides that require a gentle yet firm touch. When unclipping it, pull steadily, gradually increasing the force. It’s crucial to be patient here; a sudden jerk might break the clips. I broke the plastic clips when pulling it off several times (the screws hold it on just fine, though).

There you have it! With these steps, you should be able to open up your machine with ease. Remember, always approach the task with patience and care.
Adjusting the Over-Pressure Valve (OPV)
Now, we can see inside the machine – the fun part :). Take a minute to understand the basic schematic: water enters from the bottom through the flow meter. Then, there’s a vibratory pump along the bottom that pushes water up into the thermal coil on top. If you observe closely, you’ll see where the cold water enters from the top. As it travels, the heated element warms the water, and the brew head is right underneath.
What we care about is the Over-Pressure Valve (OPV). This is the T-section between the pump and thermocoil.
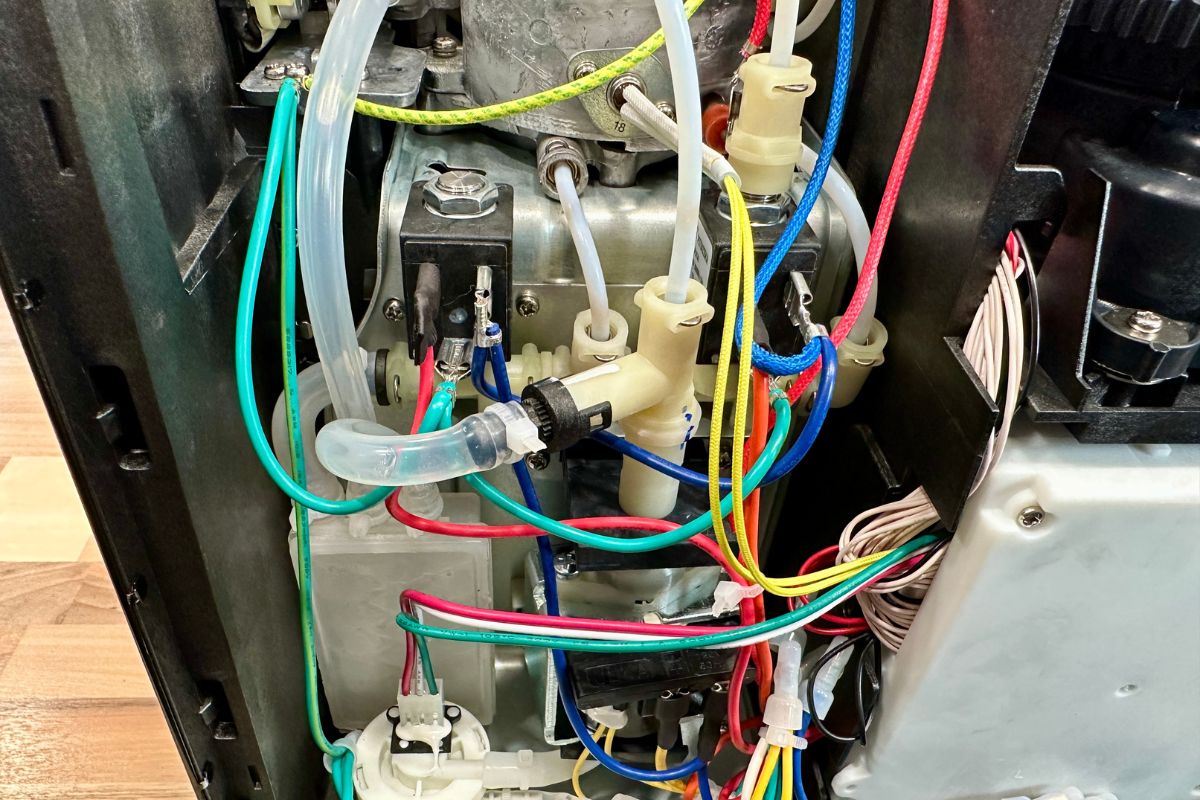
The OPV is important because it releases excess water into the drip tray to manage the pump’s high pressure. Remember, vibratory pumps tend to run either “on” or “off,” and on is at high pressure. The OPV moderates this, but the factory settings might have it screwed on too tightly. Adjusting this can help achieve the right pressure.
To modify the OPV:
- Remove the Zip Tie: First, use a small flathead screwdriver to slide under the zip tie, creating a bit of space. This allows you to snip it off with scissors.
- Detach the Tube: Carefully slide the tube off.
- Remove the clip: unclip the small piece on the OPV screw
Now, we can modify the OPV screw, which is the main process. Before making adjustments, I highly recommend marking its original position. Check for any pre-existing markings or scour it with a knife. The mark ensures you can monitor your adjustments accurately.
Now, you release pressure by unscrewing the OPV. Rotate counter-clockwise, away from you. It’ll be obvious the screw is “coming off,” and it’s already on as tight as possible when you start.

Typically, you can unscrew the OPV two to two and a half rotations without it falling off. Aim for this range, using the marking as your guide.
Don’t overdo it, as the OPV will fall off. I can unscrew a max of 2 and quarter rotations.
After adjustments, it’s time to put everything back in place. Attach the clip to the tube and secure it using a new zip tie.
Testing and Results of OPV Mod
After some tinkering with the Barista Express machine, I finally reassembled it – though, for testing purposes, I initially secured it with just one screw. The real question was: did the modifications make a difference?
Pressure Testing:
I ran a test on the machine’s pressure using a homemade pressure gauge. The pressure now read at 12 bars from its previous high of 14 or 15 bars. Ideally, I would have liked to bring it down to nine bars, but the OPV would fall off. Hence, 12 bars was the best I could achieve.
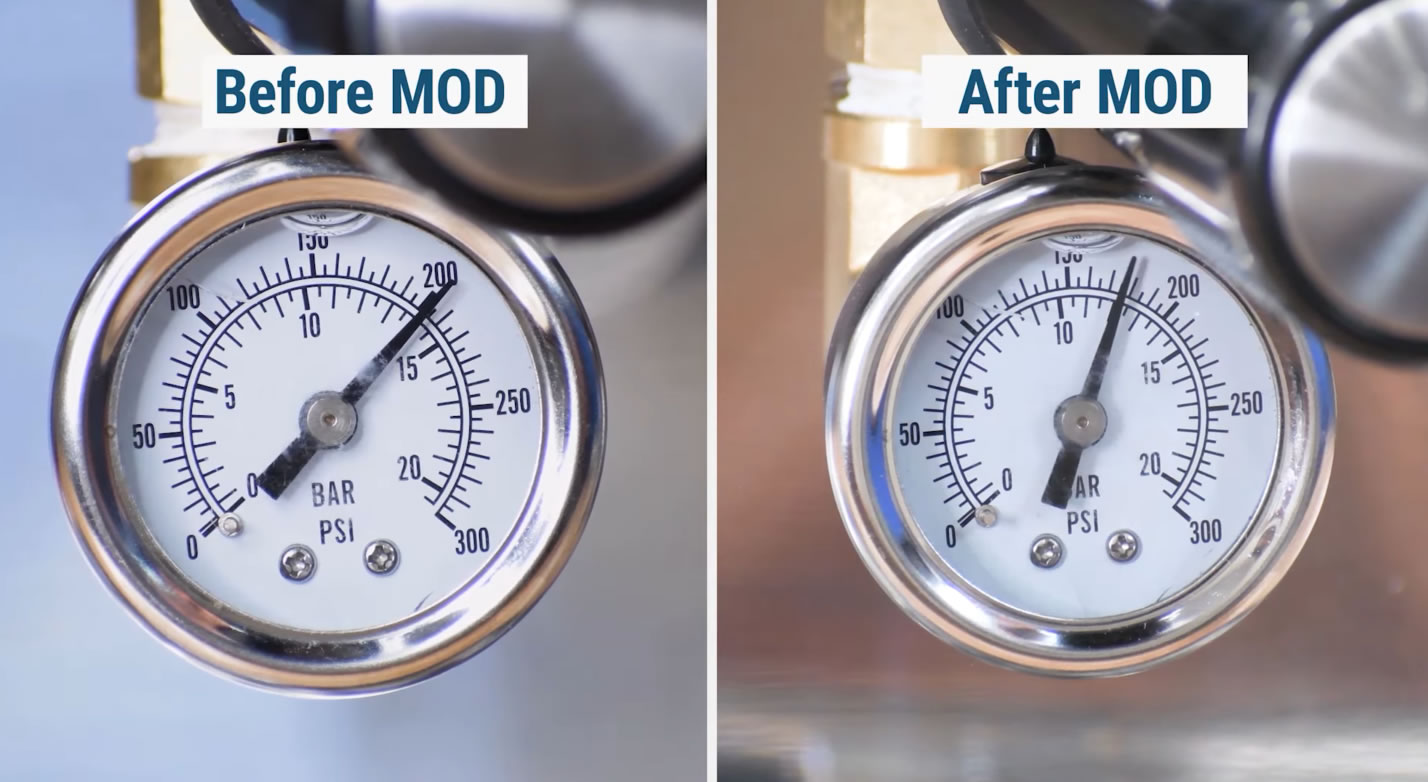
If you want to test your machine, a simple tip is to insert the blind basket into the portafilter. Look it in, run the machine, and look at where the pressure gauge peaks. Each mark on the pressure gauge roughly represents two bars.
Taste Test:
The ultimate test for any espresso machine mod is the taste. So, I brewed an espresso. The espresso was noticeably smoother. Having modified the machine several times, varying between 12 bars and the original pressure, the change was clear to me.
I was critical of the original Barista Express when compared to the Barista Pro. The Express had a sharpness to its taste – an imbalance of sourness and bitterness. But now, those extremes had mellowed, resulting in a more balanced and cleaner flavor profile.
Even at 12 bars, the taste vastly improved.
Ease of Use:
Another noticeable improvement was in the machine’s usability. I was also critical of the limited grind settings on the BBE. I felt confined to one or two settings to achieve a good shot. Now, with the pressure modifications, there’s a noticeable difference in the flow at various grind settings.
The shots now run slower at coarse settings but faster at fine settings. It’s interesting that lower pressure leads to higher flow at fine settings, but 14-15 bars cause too much turbulence in the espresso puck, which often leads to choking. With the adjusted pressure, the range of grind sizes feels more expansive and forgiving.

The OPV modification improved my Barista Express. It not only improves the flavor profile but also makes the machine more user-friendly. If you’re an espresso enthusiast looking for a balanced taste and a hassle-free brewing experience, I recommend this.
What About Other Brevilles?
When it comes to Breville espresso machines, I haven’t gone ahead and tested those. I did open up my Bambino, and it had the same internal design, so I’m sure the OPV mod can be done.
However, I decided not to go forward with more mods because I already found the newer Breville models, like the Barista Pro, already run at a lower 10 or 11 bars. This was the same for the Bambino too, and the Barista Express Impress runs at 9 bars. My guess is it’s just the older models – Barista Express, Duo Temp, and Infuser, that run at really high pressure.
I did modify my Gaggia Classic Pro. I adjusted its pressure from 12 bars to 9 bars by changing the spring. Interestingly, the change in taste wasn’t as profound as with the Barista Express.
This suggests that the optimal pressure range is 9 to 12 bars. 9 bars is better than 12 bars, but there are diminishing returns as 12 bars make a bigger difference than 14 to 15 bars.
If you’ve tried this mod or have any thoughts, I’d love to hear about your experience! I’m happy to share the feedback with others to improve this upgrade.